
For proactive churn reduction, automate account monitoring
Customer churn remains one of the most significant challenges for subscription-based businesses, with studies showing that 80% of app users churn within the first 3 months. What makes this particularly concerning is that most users churn silently - they don't complain or ask for help, they simply stop using your product.
The correlation between product usage and churn is well-documented. When customers sign up but don't engage meaningfully with your product (or their usage declines over time), they're significantly more likely to cancel. This makes usage monitoring one of the most powerful tools in your churn prevention arsenal.
Pro tip: Focus on monitoring the first 90 days after signup - this is when customers are most vulnerable to churn and also when proactive engagement can have the biggest impact.
Step 1: Create a new Make scenario and add the Snowflake app
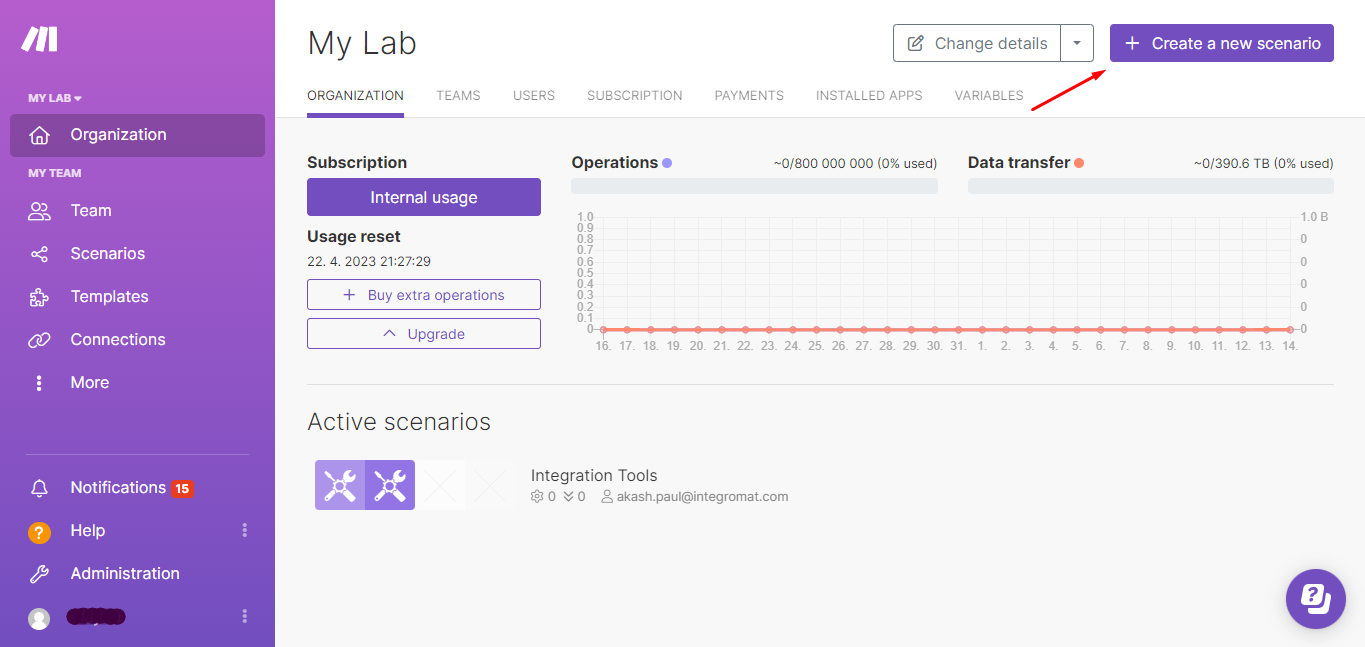
Begin by logging into your Make account and navigating to the Scenarios section. Click "Create a new Scenario" to access the visual workflow builder where we'll construct our churn detection system.
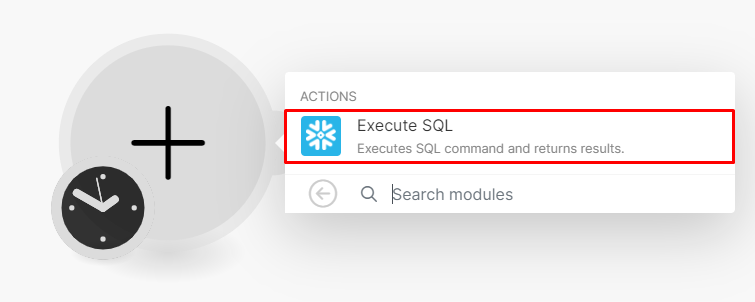
In the blank scenario canvas, click the plus sign to add your first module. Search for and select the Snowflake app, then choose the "Execute SQL" module - this will allow us to query your product usage data directly from Snowflake.
Step 2: Configure the Snowflake module
With the Snowflake module added, you'll need to establish a connection between Make and your Snowflake account. Click "Add" to configure the connection, entering your Snowflake credentials and server details.
Once connected, you'll configure the SQL query that identifies at-risk accounts. A typical query might look for accounts that are less than 90 days old with usage metrics below your defined threshold (like fewer than 5 logins in the last 30 days).
Step 3: Add the first Salesforce module
Now we'll add Salesforce integration to flag at-risk accounts. Add a "Salesforce - Update a Record" module connected to your first Snowflake module. This will allow us to update the status of identified accounts in Salesforce.
Configure the module to set a custom field (like "Churn Risk" or "Priority Status") to "High" for all accounts returned by your Snowflake query. This creates visible flags in Salesforce that your team can act upon.
Step 4: Add the second Salesforce module
Next, add a "Salesforce - Get a Record" module to retrieve full details for each flagged account. This ensures your team has all necessary context when reviewing at-risk customers.
Map the record ID from your initial Snowflake query to this module, pulling in additional fields like company name, ARR, and customer segment that will help prioritize outreach efforts.
Step 5: Add the Text aggregator module
To streamline notifications, we'll use Make's Text aggregator module to consolidate all at-risk accounts into a single, organized message rather than sending individual alerts.
Configure the aggregator to include key details from Salesforce like account name, days since signup, and usage metrics. Add line breaks between entries for readability.
Step 6: Add the last module
The final piece is notification delivery. Add a Slack (or email) module to send the aggregated list to your customer success or sales team.
Configure the message with clear formatting and suggested next steps, making it easy for your team to take immediate action on the highest-risk accounts.
Step 7: Test and save to start preventing churn!
Before going live, thoroughly test your scenario using the "Run once" feature. Verify that it correctly identifies test accounts, updates Salesforce, and sends properly formatted notifications.
Once validated, set your scenario to run on a regular schedule (weekly is common) and activate it. You now have an automated system proactively identifying and flagging at-risk customers!