What This Workflow Does
This powerful workflow automates the process of sending personalized emails directly from data stored in your Google Sheets. While standard mail merge features might allow mass sending, they often fall short on true personalization. This Make.com scenario bridges that gap, enabling you to populate email content, subjects, and recipients with specific data from each row of your spreadsheet. Imagine sending tailored updates, marketing messages, or holiday greetings to hundreds of contacts, each feeling individually crafted, all with minimal manual effort.
Beyond just sending, the automation also intelligently manages your communication by marking each row in your Google Sheet with a "Sent" status once the email is successfully delivered. This prevents duplicate sends and provides a clear audit trail of your outreach. It transforms your Google Sheet from a static data repository into a dynamic command center for your email campaigns, ensuring efficiency and accuracy in all your mass communications.
How It Works
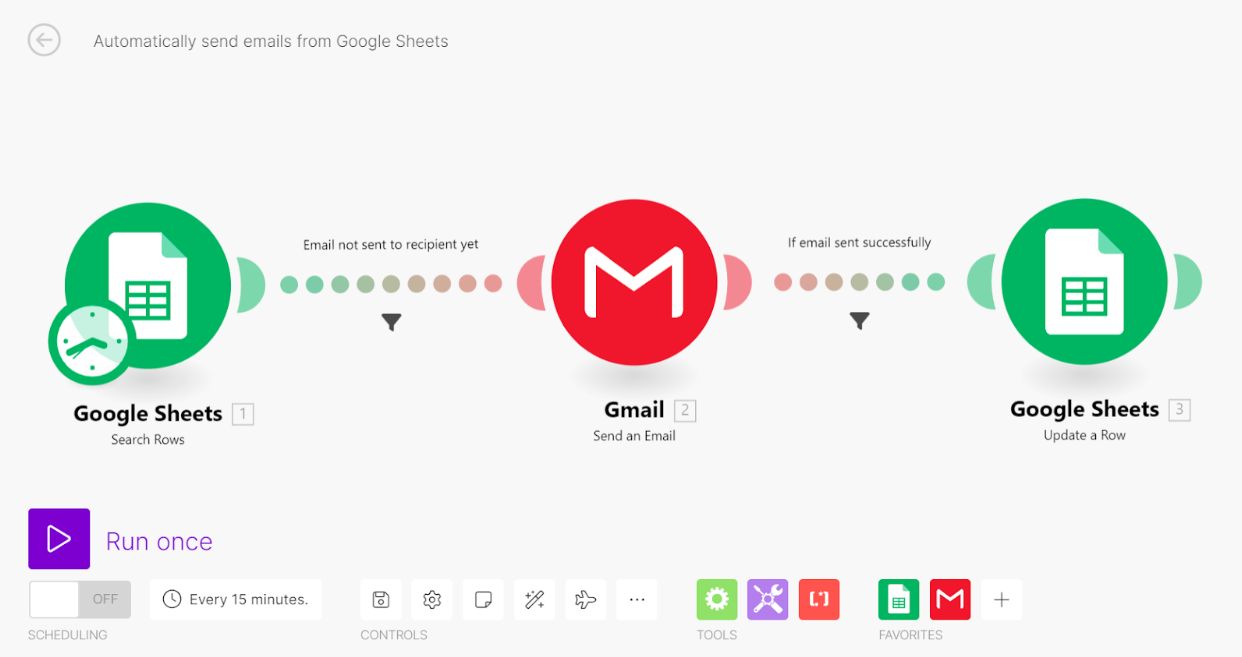
This automation operates through a series of interconnected modules in Make.com, orchestrating a seamless flow from your Google Sheet to your recipients' inboxes.
Step 1: Monitor Google Sheet for New Data
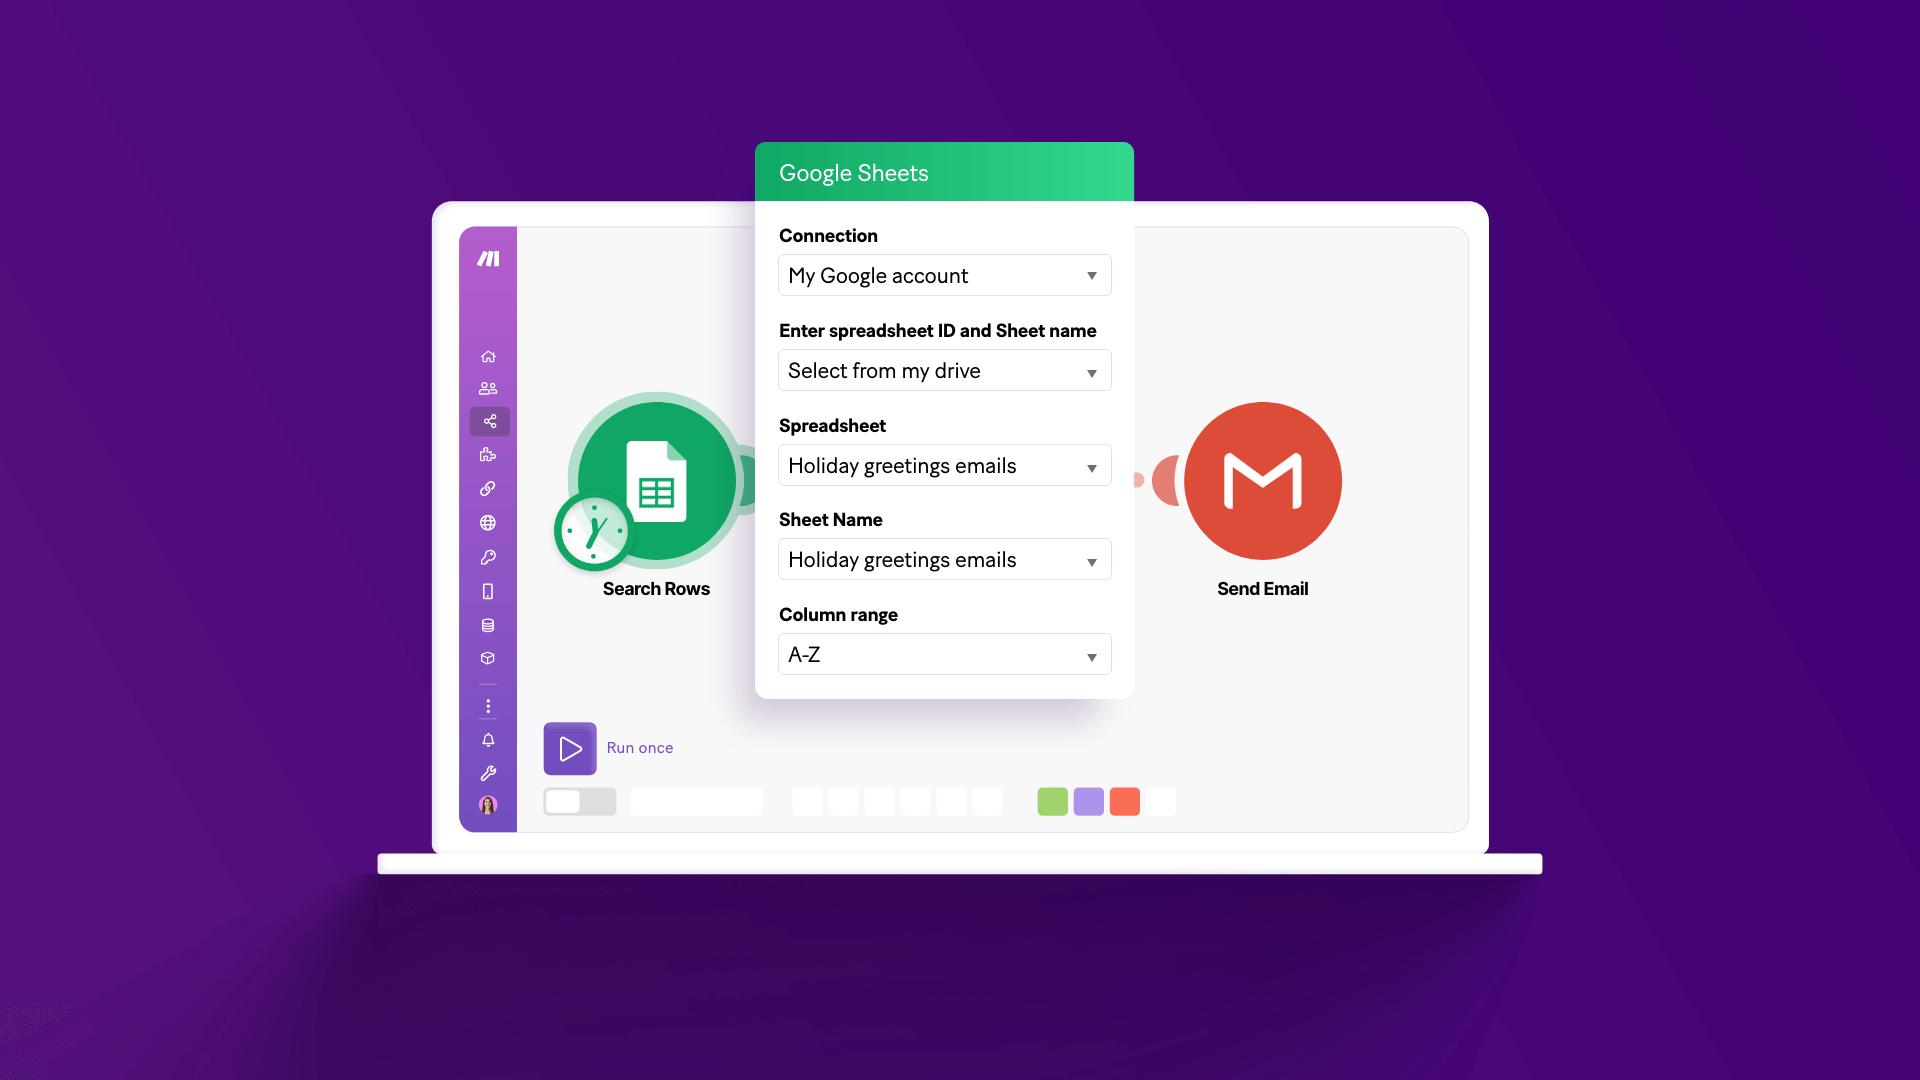
The workflow begins by continuously monitoring a specified Google Sheet for new or updated rows. This acts as the trigger, initiating the email sending process whenever new recipient data is ready for action. You define which sheet and columns contain the necessary information, such as email addresses, names, and custom message segments.
Step 2: Personalize Email Content
Once new data is detected, Make.com extracts the relevant information from each row. This data is then dynamically mapped into a pre-designed email template within your Gmail (or other email service) module. This ensures that each email is uniquely personalized, addressing the recipient by name and including any other specific details you've prepared in your Google Sheet.
Step 3: Send Personalized Emails via Gmail
With the email content fully personalized, the Gmail module takes over, sending out each email to its intended recipient. The beauty of this step is that it mimics individual email sends, enhancing deliverability and personal touch, rather than appearing as a generic mass mailing. Filters are in place to ensure only unsent emails are processed, preventing accidental duplicates.
Step 4: Update Google Sheet Status
Immediately after an email is successfully sent, the workflow updates the corresponding row in your Google Sheet. A dedicated "Email Status" column is marked as "Sent," providing real-time tracking and ensuring that the same email isn't sent twice. This crucial step maintains data integrity and gives you a clear overview of your communication efforts.
Who This Is For
This automation is ideal for anyone who regularly sends personalized communications to a list of contacts and wants to eliminate manual work. This includes:
- Small Business Owners: For sending marketing newsletters, customer updates, or personalized offers without investing in complex CRM systems.
- Sales Teams: To automate follow-up emails, send product information, or deliver personalized outreach to leads based on their stage in the sales funnel.
- Marketing Professionals: For executing targeted email campaigns, distributing content, or sending event invitations with a high degree of personalization.
- Event Organizers: To send registration confirmations, event details, or post-event surveys to attendees.
- HR Departments: For sending onboarding information, policy updates, or personalized announcements to employees.
- Educators: To communicate with students or parents, send assignment reminders, or distribute class updates efficiently.
Essentially, if you manage contact lists in Google Sheets and need to communicate with them in a personalized yet scalable way, this workflow is designed to save you time and improve your outreach effectiveness.
What You'll Need
To set up and run this automated workflow, you'll need the following:
- A Make.com account (a free account is sufficient to get started).
- A Google account with access to Google Sheets.
- A Gmail account (or another email service connected to Make.com, such as Outlook).
- A Google Sheet prepared with your recipient data, including columns for email addresses, names, and an "Email status" column.
Quick Setup Guide
Follow these steps to quickly set up your email automation:
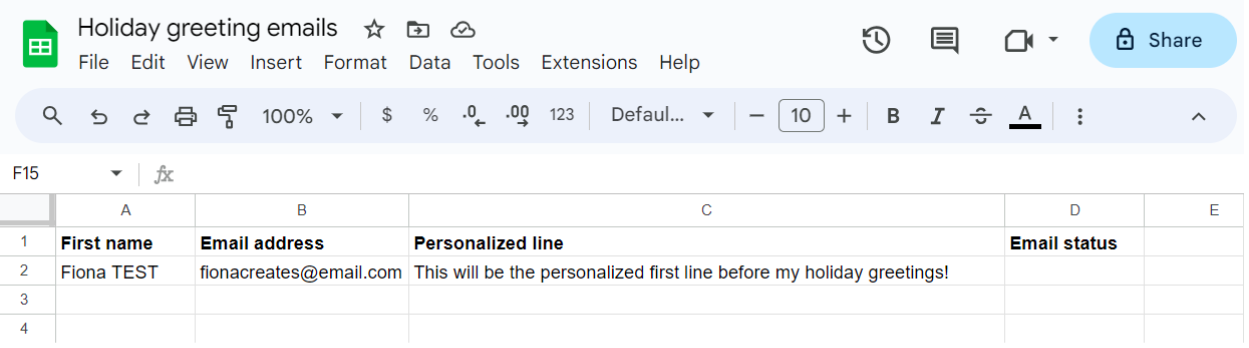
- Prepare Your Google Sheet: Create a new Google Sheet with columns for 'Email address', 'First name', and an 'Email status' column. Add a test row with your own email to verify the setup.
- Create Make.com Scenario: Log into Make.com and create a new scenario.
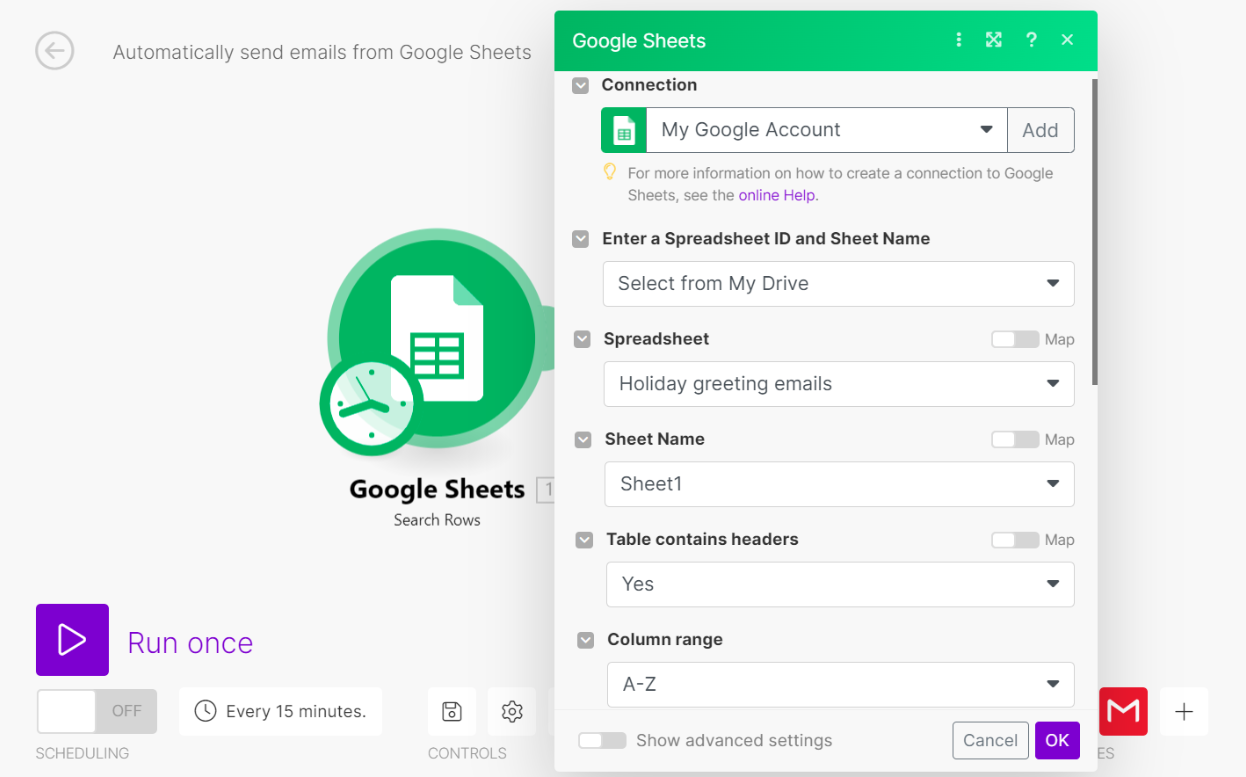
- Add Google Sheets 'Search Rows' Module: Add the Google Sheets 'Search Rows' module. Connect your Google account, select your spreadsheet and sheet name, and set the column range (e.g., A-Z).
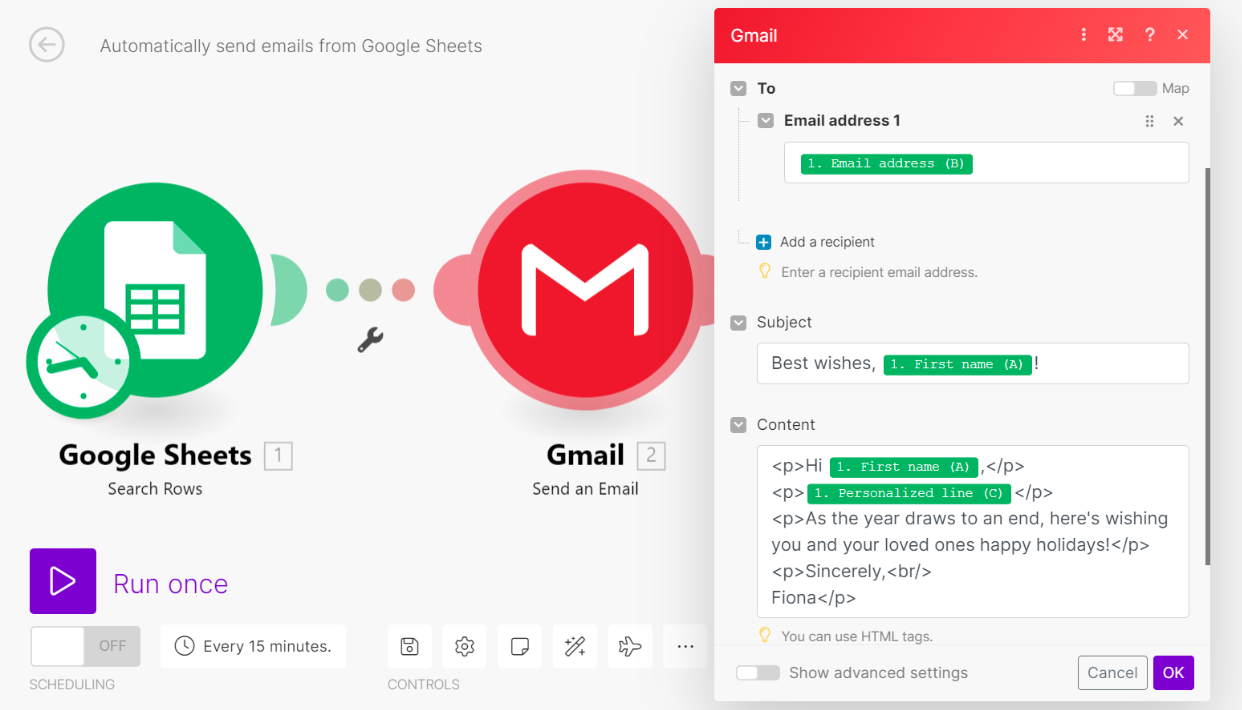
- Add Gmail 'Send an Email' Module: Add the Gmail 'Send an Email' module. Connect your Gmail account. Map the 'Email address' from Google Sheets to the 'To' field. Customize the 'Subject' and 'Content' fields using data items from your Google Sheet for personalization.
- Insert Filter (Email Not Sent): Add a filter between the Google Sheets and Gmail modules. Set the condition to check if 'Email status' is 'Not equal to' 'Sent'. This prevents re-sending emails.
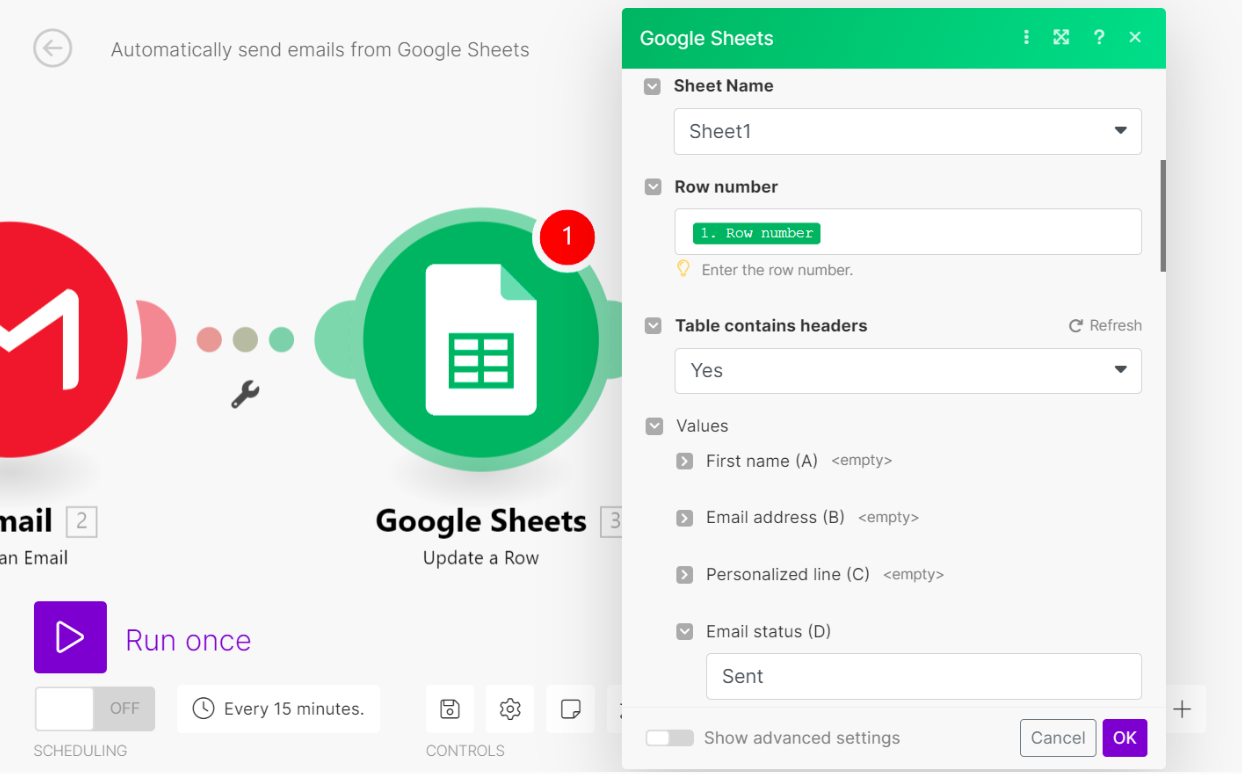
- Add Google Sheets 'Update a Row' Module: After the Gmail module, add a Google Sheets 'Update a Row' module. Connect your Google account, select your spreadsheet and sheet. Map the 'Row number' from the first Google Sheets module and set the 'Email status' value to 'Sent'.
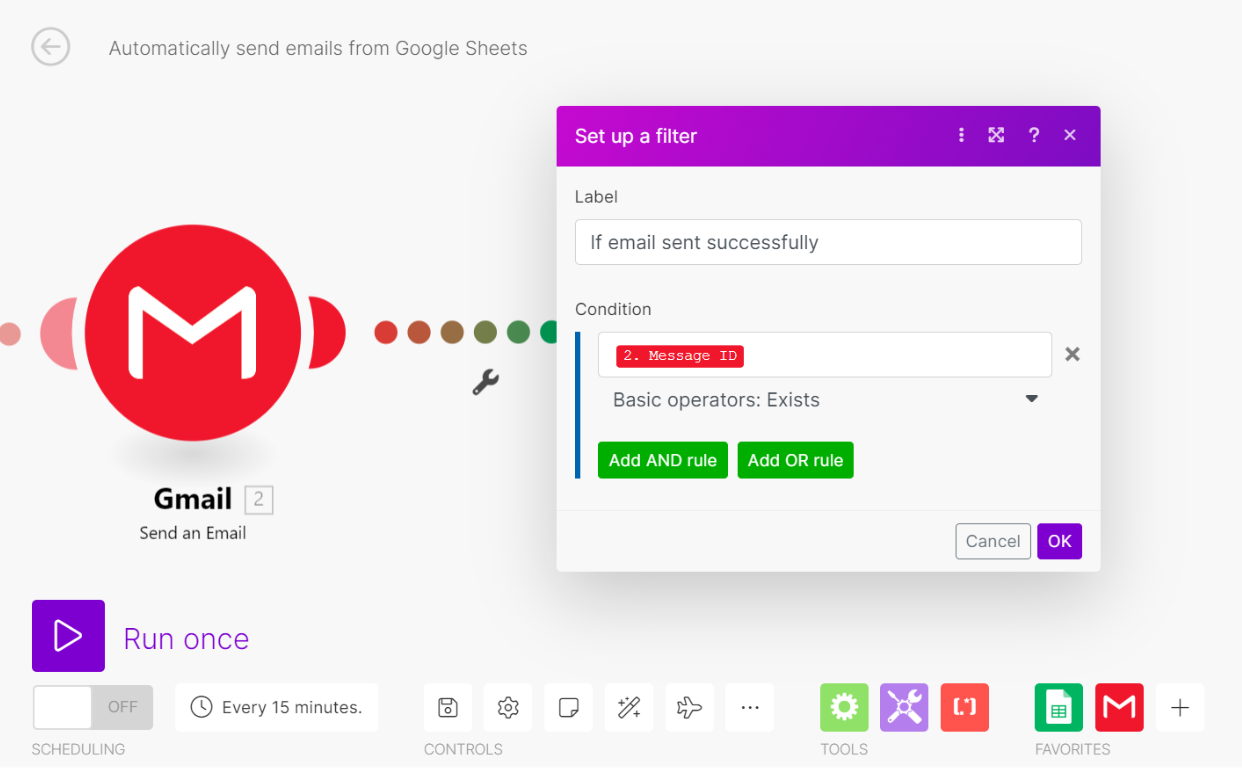
- Insert Filter (Email Sent Successfully): Add a filter between the Gmail and 'Update a Row' modules. Set the condition to check if a 'Message ID' 'Exists' from the Gmail module. This ensures the status is only updated if the email was actually sent.
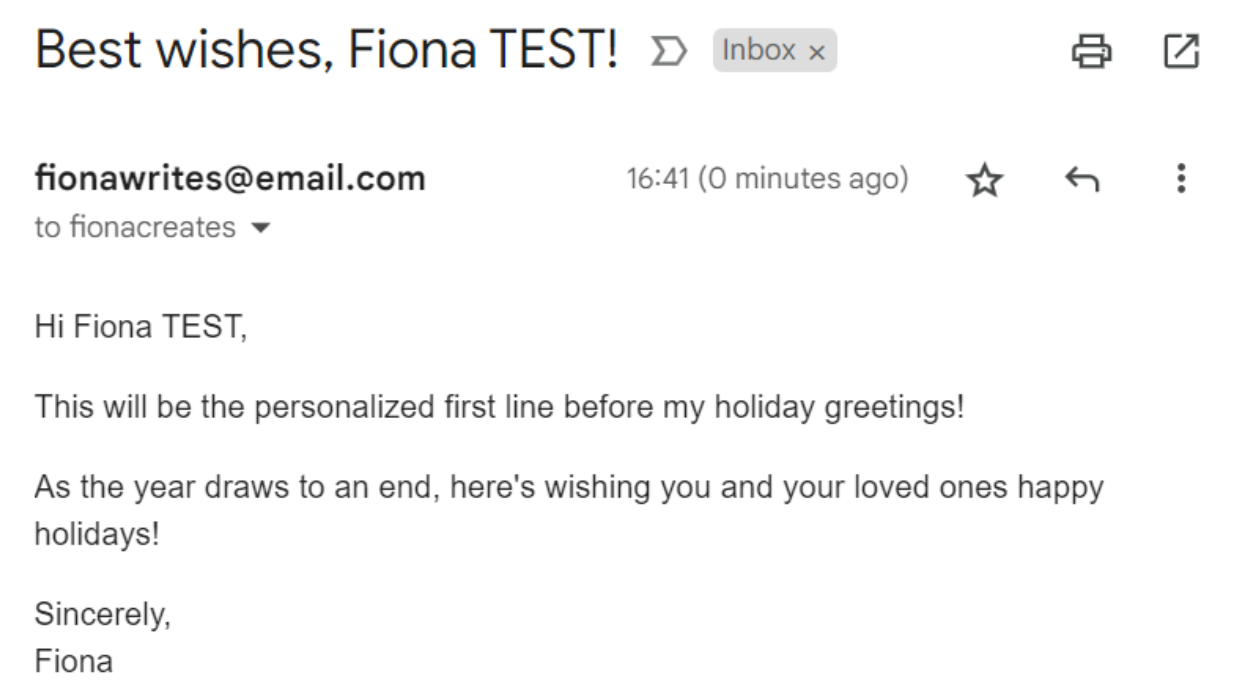
- Test and Activate: Click "Run once" to test the scenario with your test data. Verify that you receive the email and that the 'Email status' in your Google Sheet is updated. Once confirmed, you can activate the scenario to run automatically.

Key Benefits
Save Hours on Manual Outreach: Eliminate the tedious task of sending individual emails, freeing up significant time for more strategic work.
Boost Engagement with Personalization: Deliver tailored messages that resonate more deeply with recipients, leading to higher open and response rates.
Ensure Accuracy and Prevent Duplicates: Automated status tracking in Google Sheets guarantees each recipient receives only one email, maintaining professional communication.
Scale Your Communications Effortlessly: Easily manage and send emails to large contact lists without compromising on personalization or efficiency.
Maintain Organized Communication Records: Keep a real-time, updated log of all sent emails directly within your Google Sheet for easy reference and reporting.