Revolut Business has become a favorite for many due to its convenient and user-friendly digital banking services. Its reputation as a "fintech superstar" is well-deserved, offering a seamless experience for managing business finances.
Given its widespread adoption and powerful features, it was only a matter of time before Revolut Business could be integrated with leading workflow automation tools. This guide will demonstrate how to connect Revolut Business with Google Sheets using Make, enhancing your financial operations.
Automating Revolut Business workflows with Make
Improving business efficiency often involves refining core processes. Workflow automation is an invaluable tool for achieving this quickly and effectively, leading to several key benefits:
- Time savings
- Reduced errors
- Improved communication and collaboration
In this article, we will walk you through creating your first automated workflow, or "scenario," in Make. Our goal is to simplify a common Revolut Business task: automatically saving draft payment details to a Google Sheets spreadsheet for accurate record-keeping.
This automation is designed to be straightforward, making it an excellent starting point for new Make users. It tackles a task that, while simple, can be time-consuming when performed manually. Automating it frees up valuable time and ensures data consistency.
Pro tip: If you're new to Make, familiarize yourself with its basic terminology. A "scenario" is simply an automated workflow, and understanding this will help you navigate the platform more effectively. Make also offers a free tier, perfect for getting started with simple automations like this one.
Connecting Revolut Business with Google Sheets
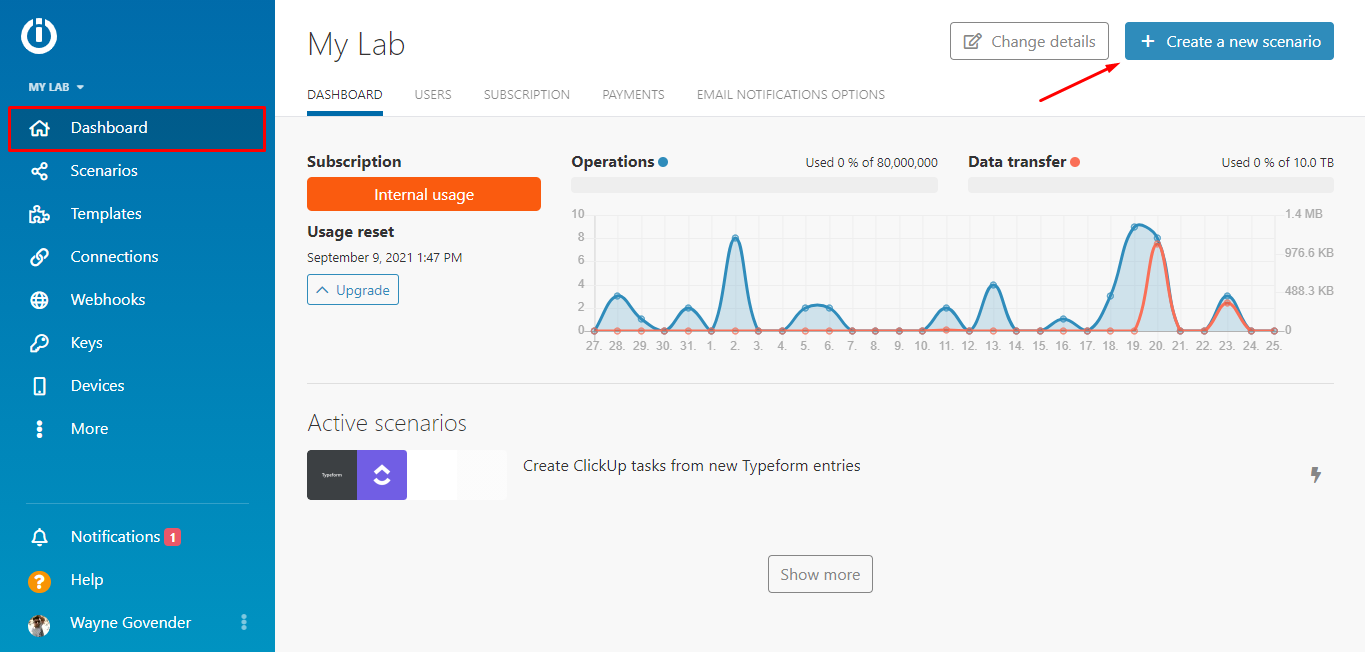
Once you have successfully created your Make account and logged in, you will be directed to your dashboard. This is your central hub for building and managing all your automations. From here, we will begin constructing our scenario to integrate Revolut Business with Google Sheets.
1. Creating the scenario
To initiate the creation of your new automation, locate and click the "Create a new scenario" button, typically found in the top right corner of your Make dashboard. This action will open the visual scenario builder, which is where you will design your workflow.
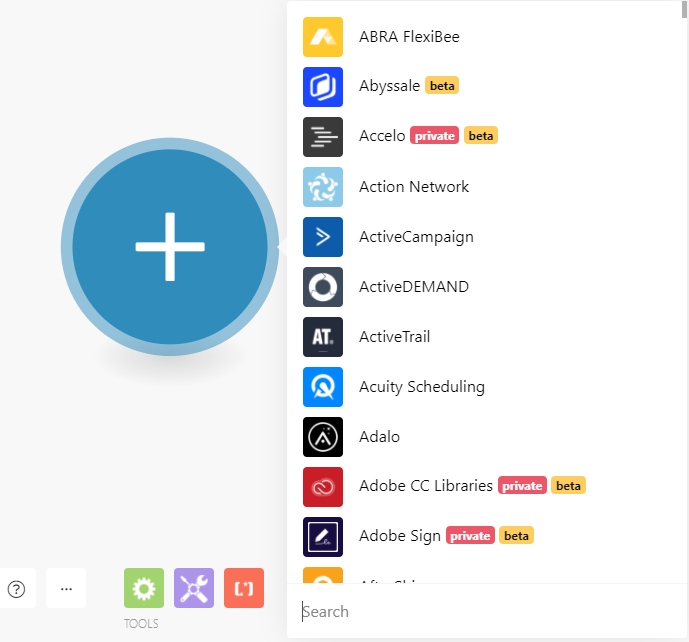
Within the visual builder, click on the central circle to bring up a comprehensive list of all applications available for integration within Make. Search for "Revolut Business" to find the relevant app and view the various actions it supports for draft payments.
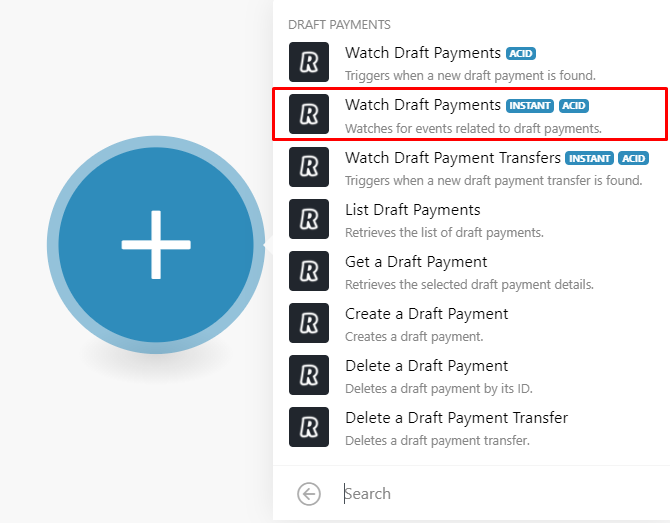
Since the objective is to automatically transfer draft payment information to a spreadsheet, select the "Watch Draft Payments" instant module. This module acts as the trigger for your scenario, initiating the workflow whenever a new draft payment is created in Revolut Business.
This trigger module is designed to instantly capture the unique IDs of new draft payments as they appear in your Revolut Business account. These IDs are crucial, as they will be used by the subsequent module in our scenario to fetch all the detailed information associated with each payment.
2. Configuring the “Watch Draft Payments” module
The next step involves establishing a secure connection between your Revolut Business account and Make. This connection is essential for Make to access and monitor your draft payments. You will also need to create a webhook, which is a mechanism for Revolut Business to instantly send payment IDs to Make as they are generated.
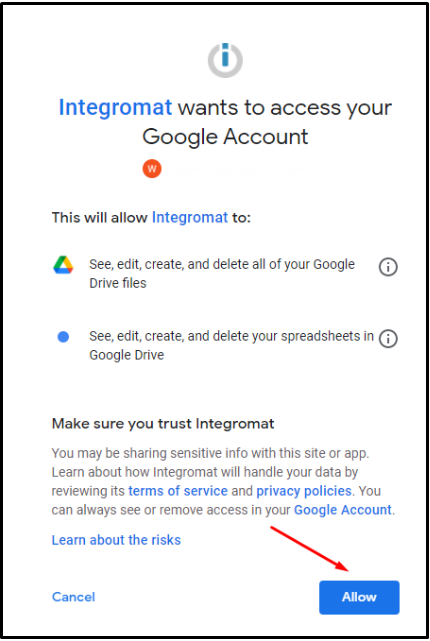
To set this up, simply click the "Add" button within the module's configuration. You will then be prompted to log into your Revolut Business account and grant Make the necessary permissions to connect. This ensures a secure and authorized data flow.
Once you have successfully logged in and approved the connection, click "Save" to confirm the webhook setup. Afterward, click "OK" to finalize the module's configuration. At this point, your first Revolut Business module is fully configured and ready to receive draft payment IDs.

With the initial trigger module configured, the foundation of your automation is in place. The next steps will involve retrieving the full details of these payments and then sending them to your Google Sheet.

3. Adding and configuring the “Get a draft payment” module
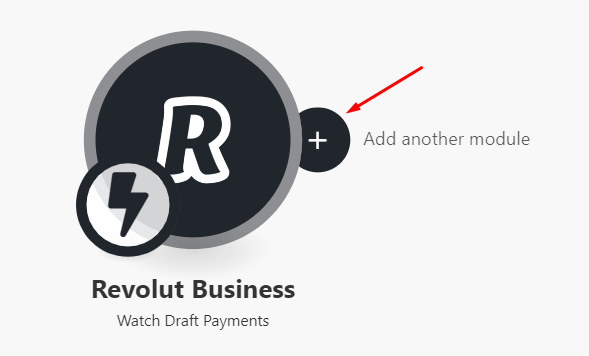
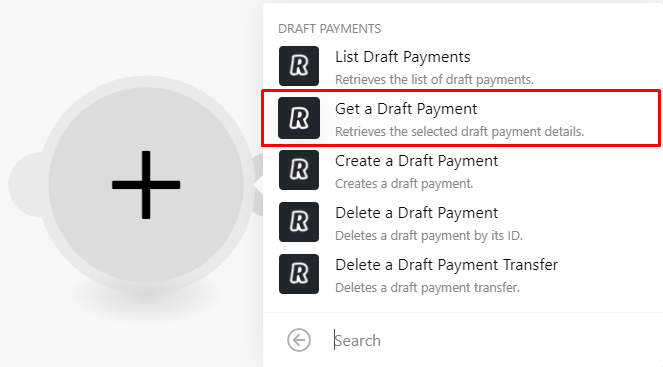
Now that we can detect new draft payments, the next logical step is to retrieve their full details. To do this, you'll add a second Revolut Business module: "Get a draft payment." Hover your mouse over the first Revolut Business module and click the "Add another module" button that appears on its side.
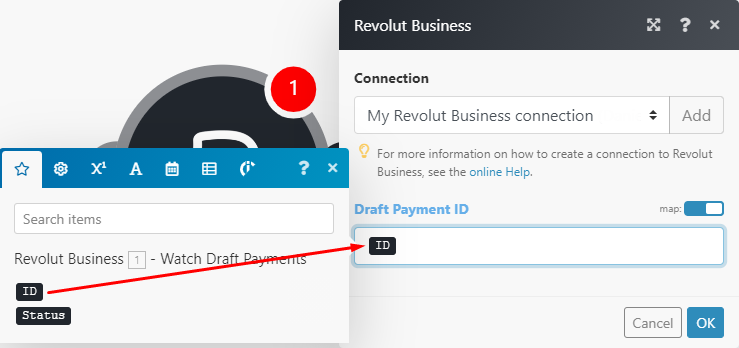
Once you've selected the "Get a draft payment" module, the configuration window will appear. The crucial step here is to map the "ID" data element from the initial "Watch Draft Payments" module to the "Draft Payment ID" field in this new module. This ensures that for every new draft payment detected, its specific details are fetched. After mapping, click "OK" to complete the setup for this module.
This module acts as an intermediary, taking the raw ID from the trigger and expanding it into a complete set of payment data that can then be used in subsequent steps. This structured approach ensures that all necessary information is available for your Google Sheet.
The mapping step is critical for ensuring data accuracy. By dragging and dropping the "ID" element, you create a dynamic link that automatically passes the correct payment identifier to retrieve its details. This eliminates manual data entry and potential errors.
With the payment details now accessible, we can proceed to the final step: sending this information to your Google Sheet.
4. Adding and configuring the “Add a Row” Google Sheets module
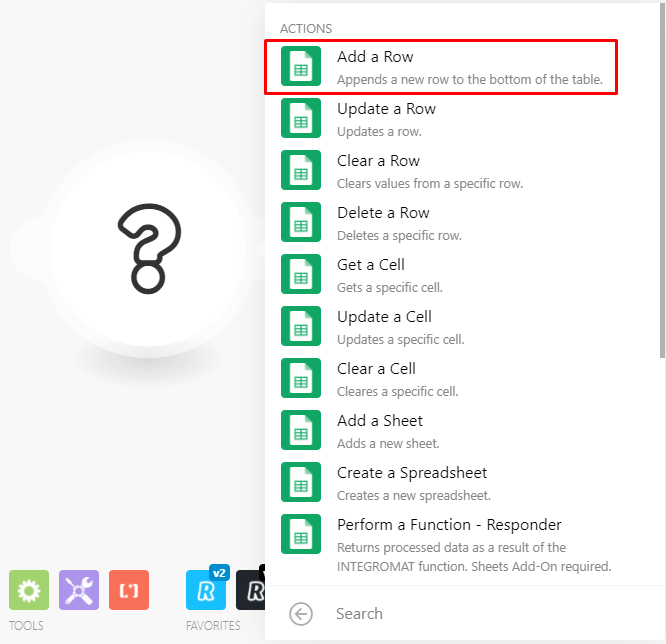
To complete the automation, you will now add the final module to your scenario. Click the "Add another module" button on the second Revolut Business module. In the app search bar, look for "Google Sheets" and then select the "Add a row" action, as our objective is to append new payment data to your spreadsheet.
Similar to connecting Revolut Business, you will need to link your Google account to Make. Follow the on-screen prompts to log in and grant Make the necessary access to your Google Sheets. This secure authorization ensures that Make can interact with your chosen spreadsheet.
Before configuring the Google Sheets module, it's essential to prepare your spreadsheet. Create a new Google Sheet with the following column headers:
- ID
- Status
- Amount
- Currency
- Reference
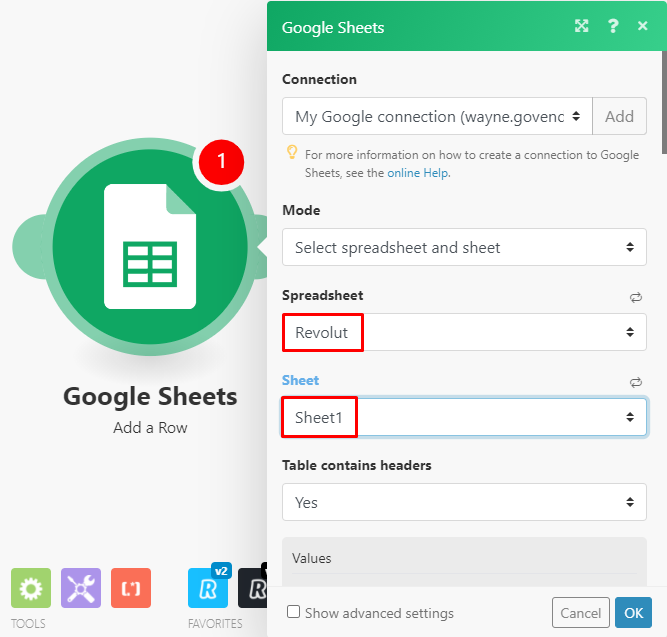
These column names are designed to directly correspond with the data elements that Make will extract from Revolut Business. Once your spreadsheet is ready, return to the Google Sheets module in Make. Select the correct spreadsheet and the specific sheet within it where you want the data to be added.
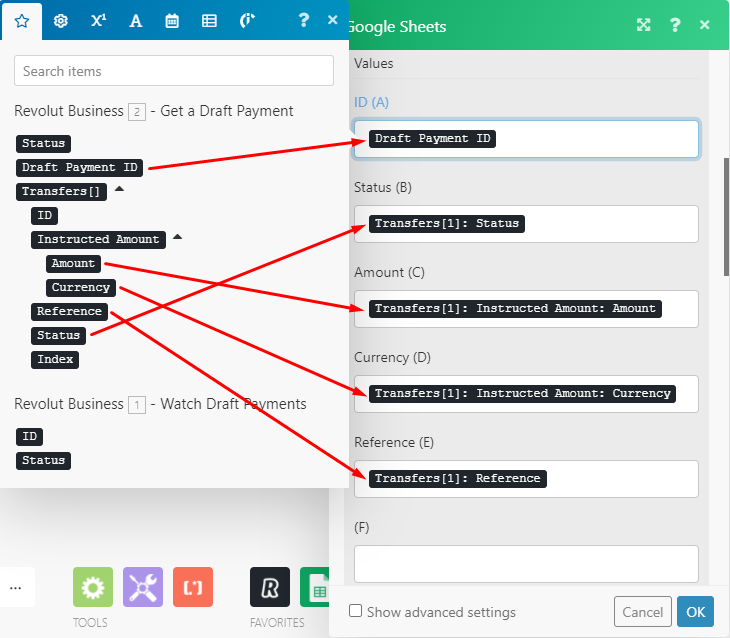
The final and most critical step in configuring this module is to map the data elements from the Revolut Business module to their corresponding fields in your Google Sheet. Drag and drop each Revolut data point (ID, Status, Amount, Currency, Reference) to its respective column in the Google Sheets module. Click "OK" to save these mappings.
With this, your Google Sheets module is fully configured. You've successfully instructed Make on which spreadsheet to use and how to populate it with data from Revolut Business. Only one step remains before you can activate your automation.
5. Testing the scenario
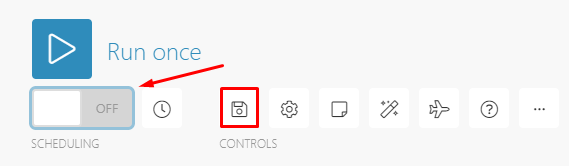
Before fully activating your automation, it's crucial to test it to ensure everything is working as expected. To do this, click the "Run once" button located at the bottom left of your Make scenario builder. After initiating the test run, navigate to your Revolut Business account and create a new draft payment.
If the automation executes successfully, you will observe a small bubble displaying the number "1" appearing above each module in your Make scenario. This visual confirmation indicates that the trigger detected the new draft payment, its details were retrieved, and a new row of data was successfully added to your Google Sheet.
Congratulations! You have now successfully created and tested your first automation scenario on Make. The final step is to save your scenario by clicking the "Save" icon at the bottom of the visual builder, and then activate it by toggling the switch located below the "Run once" button. Your Revolut Business draft payments will now automatically be recorded in your Google Sheet.