Solution overview: Email drafts à la carte
Few things are more tempting in business than complaining about emails. We get it: The sheer volume alone can be overwhelming. Many professionals - CEOs, and salespeople in particular - have to deal with the "repetitiveness" factor when it comes to email. In other words, reading and writing emails that look and feel alike, over and again.
But what if you could automatically draft email responses based on the type of email you have in front of you? This is where ChatGPT and Make enter the scene, allowing you to create drafts for emails automatically, and making your life easier. The result: Less time in your inbox, more time for your business and personal life.
Pro tip: This solution works best for standardized responses like customer inquiries, scheduling requests, or common support questions where you find yourself writing similar replies repeatedly.
The solution we're presenting here does a very good job of writing email drafts for each and every single email you receive. It's available as a Make template that you can use right away, but we'll also show you how to build it from scratch so you can understand all the nuances in it.
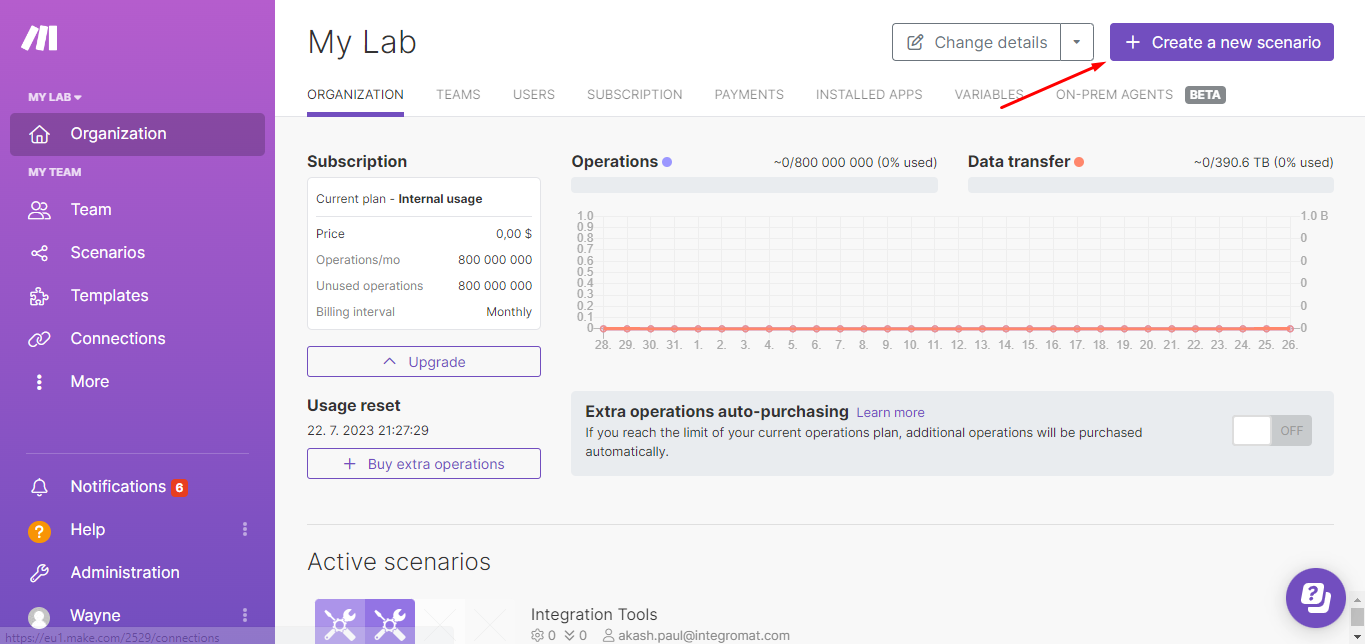
Step 1: Create a new Make scenario and add the email app
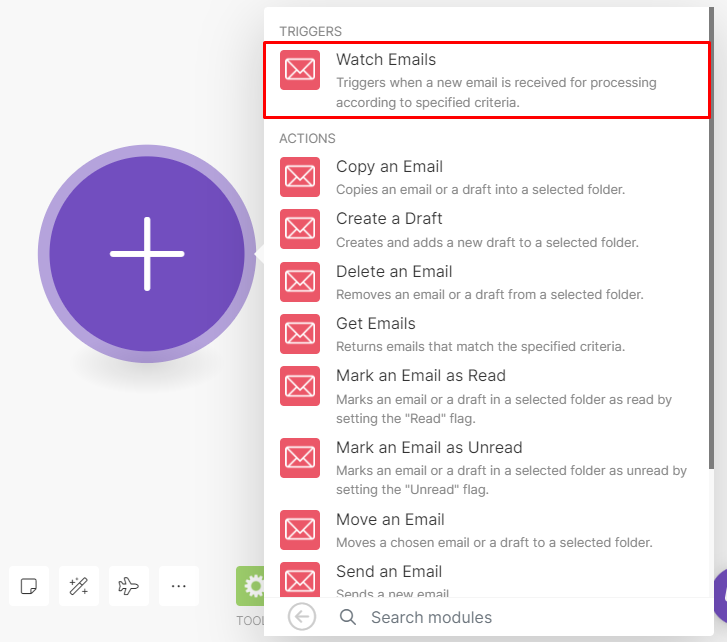
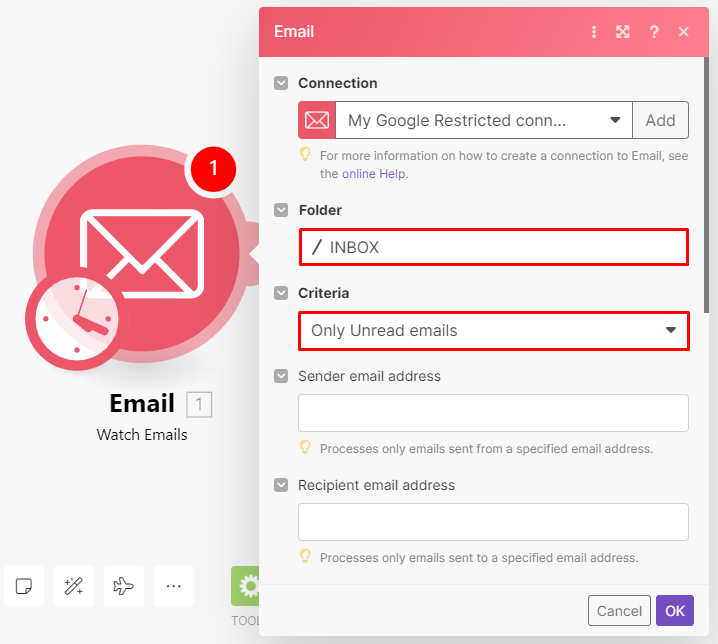
Once you have a Make account, create a new scenario from the dashboard. This will take you to the scenario builder. Search for the Email app and select the Watch emails module to the scenario, which will serve as the trigger.
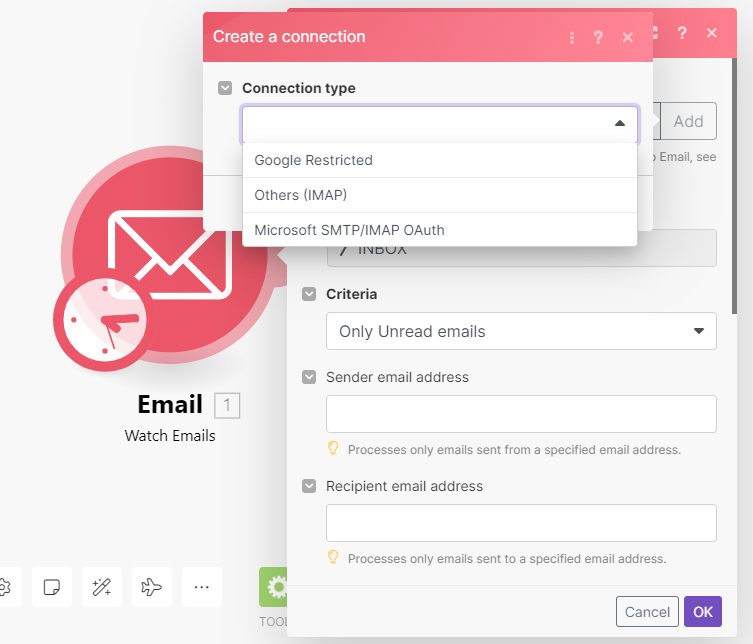
Now, you need to connect your email account to Make to proceed. Click Add and follow the instructions in the module. Select Inbox as the folder to watch, and select the Only Unread emails option as the Criteria. The Maximum number of results represents the total number of emails that will be retrieved during a single execution of this scenario.
Step 2: Add the OpenAI module
Now it's time to add the second module in the scenario, which is the OpenAI (DALL-E & ChatGPT) > Create a Completion. To add a module, click the plus sign on the right of the Email module. Then, search for the OpenAI app and select the Create a Completion module.
Next, connect your OpenAI account to Make with your OpenAI API key. To configure this module, select the "Create a Prompt Completion" method so that it only outputs the pre-defined category. Then select the latest model. You can use the prompt below and map the text content data item from the Email module.
Step 3: Add the Airtable app
When ChatGPT outputs the category of the email, Make needs to search the Airtable base for the matching category and its accompanying prompt. These will be used for context when drafting the email. To achieve this, add the Airtable > Search records module to the scenario.
Pro tip: Organize your Airtable base with clear categories and corresponding response templates. This makes the automation more accurate and easier to maintain.
Once you connect your Airtable account to Make, select the Base that we have provided above. Don't forget to edit the sample data on the table to suit your business needs! For the output fields, select all options. In the Formula field, use the following formula and map the data item from the OpenAI module.
Step 4: Add the second OpenAI module
We need to add another OpenAI (DALL-E & ChatGPT) > Create a Completion module to draft the email, but the configuration is slightly different. This time, configure the model as follows: Method: Create a Chat Completion method, which will output the full reply. Model: gpt-3.5-turbo-0301 which has the highest token limit currently (16k).
Message content: Map the prompt data item from the Airtable module and the Text content item from the Email module. We now have all the information to create the draft email.
Step 5: Add the final email module
Let's add the final module to the scenario, the Email > Create a Draft module. After connecting your email client in the module's configuration box, select the Draft folder where the email will be stored. You can enter your email address in the recipient field.
Then, set up the Subject and Content fields as shown in the screenshot below. Once ready, finish configuring the module by clicking OK.
Step 6: Schedule the scenario and turn it on
Now, it's time to set up the scenario to execute at specific time intervals according to your business needs. To do this, click the clock icon on the first module of your scenario to open the scheduling settings and set it up accordingly.

To conclude, save the scenario and switch it on to complete the setup. And that's all, folks! Your automatic email writing assistant is ready to start doing the grueling and repetitive for you.