Introduction to Google Sheets Automation
Automating tasks related to Google Sheets can significantly boost productivity, especially when you need to react instantly to data changes. This guide will walk you through setting up a scenario in Make.com (formerly Integromat) that automatically sends an email notification whenever a Google Sheet is updated. This ensures that critical information is disseminated immediately, without manual intervention.
The core of this automation relies on a powerful concept known as webhooks. Unlike traditional polling methods where a system periodically checks for updates, a webhook provides instant notifications. When a specific event occurs in a third-party service, like a change in your Google Sheet, the webhook immediately "calls" your automation platform, triggering the predefined workflow. This "don't call us, we'll call you" approach makes real-time data processing efficient and effective.
Step 1: Add the Google Sheets App to Your Scenario
To begin automating changes in your Google Sheet, the first step is to set up your spreadsheet and then configure the initial module in Make.com. Start by creating a new Google Sheet and give it a descriptive name, such as "Time-sheet." Ensure you add relevant column headers that define the data you intend to store and monitor within this sheet.
Once your Google Sheet is ready, navigate to your Make.com dashboard. Click on the "Create a new scenario" button, usually located in the top right corner. This action will open a new, empty scenario canvas where you can begin building your automation workflow. The first module you'll add will be the Google Sheets app, specifically configured to watch for changes.

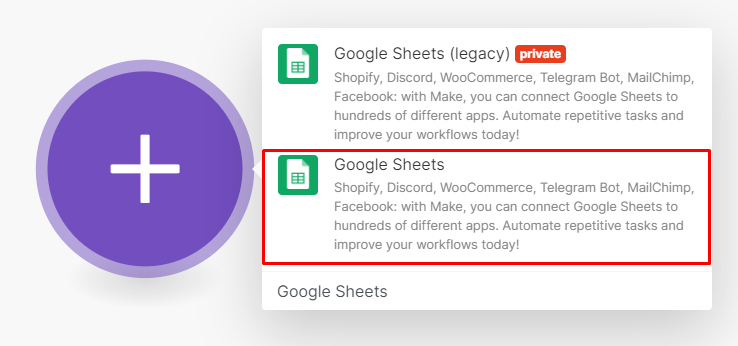
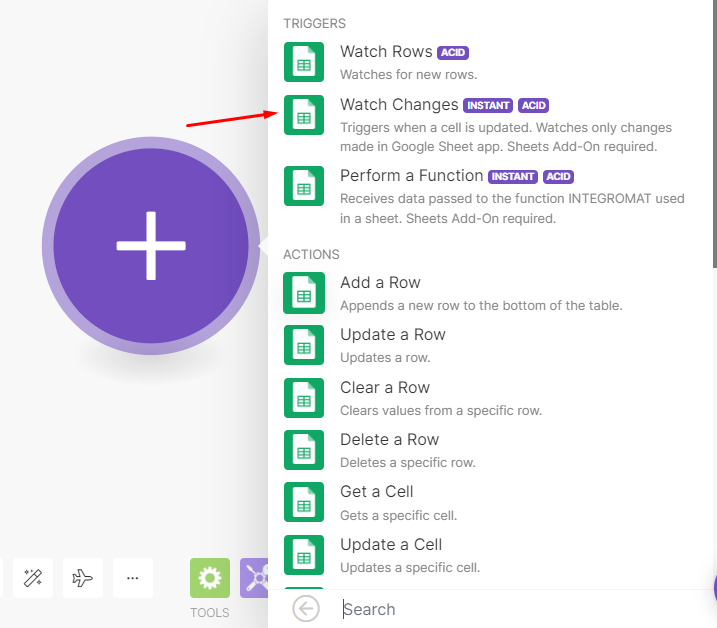
On the scenario canvas, you'll see an empty module represented by a plus sign. Click this plus sign, then use the search bar to find and select the "Google Sheets" app. After selecting the app, you'll be prompted to choose a trigger module. For this scenario, select the "Watch changes" trigger. You'll notice it's marked with an "Instant" tag, indicating its real-time notification capability.
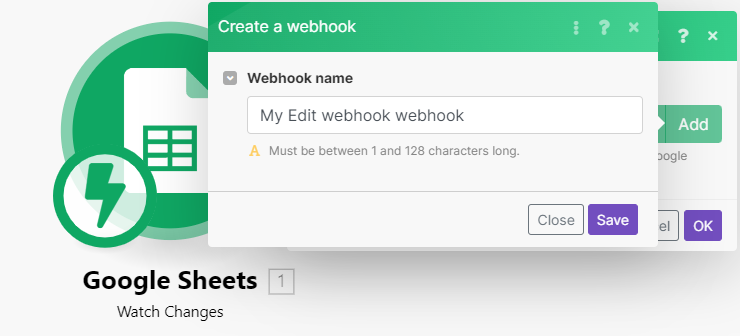
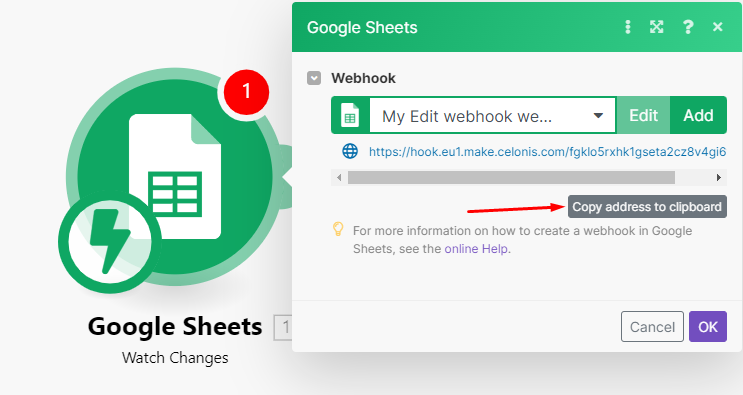
The next crucial step is to add a webhook. Within the Google Sheets module's configuration, click "Add" to create a new webhook or select an existing one from the dropdown list if you have previously configured one. Give your new webhook a clear and identifiable name, then click "Save." This webhook will serve as the bridge between your Google Sheet and Make.com, enabling instant communication.
Step 2: Install the Integromat Add-on
For the "Watch changes" trigger to function correctly and provide instant notifications, you need to install the Integromat Add-on directly within your Google Sheet. It's important to note that while Make.com is the current platform name, the add-on might still be labeled as "Integromat" in the Google Workspace Marketplace. Begin by copying the unique webhook address provided in the Google Sheets module within your Make.com scenario to your clipboard.
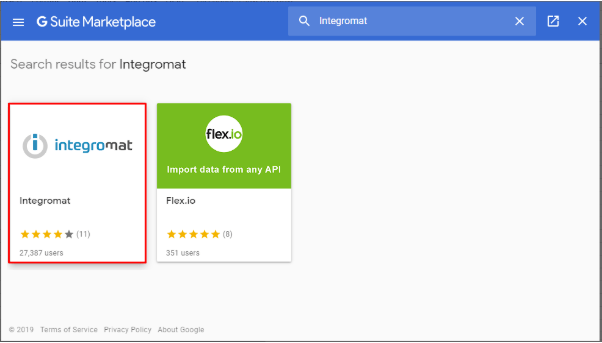
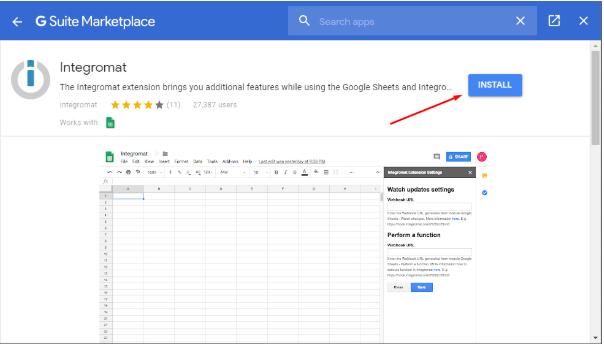
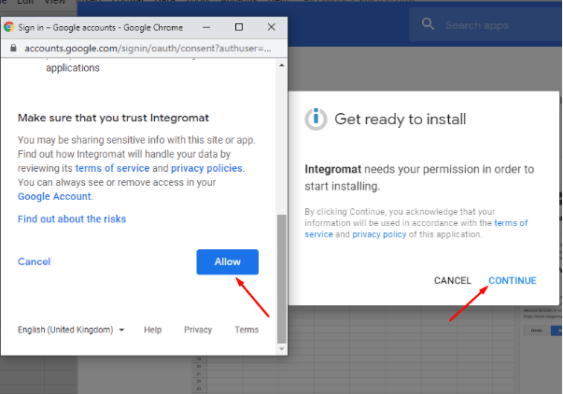
Next, navigate back to your Google Sheet. From the menu, click on "Add-ons," then select "Get add-ons." In the Google Workspace Marketplace search bar, type "Integromat" and click on the corresponding thumbnail. Proceed with the installation by clicking "Install" and then "Continue." You will be prompted to grant Integromat access rights to your Google account; click "Allow" to proceed.
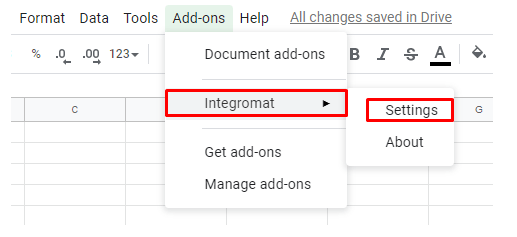
Once the Integromat Add-on is successfully installed, return to your Google Sheet and click on the "Add-ons" tab again. This time, select "Integromat" from the dropdown menu and then click "Settings." In the settings panel that appears, paste the webhook URL you copied earlier into the designated "Webhook URL" field. Finally, click "Save" to establish the connection.
With these steps completed, the webhook is now successfully integrated into your Google Sheet, and the Google Sheets module in your Make.com scenario is fully configured. This connection enables Make.com to receive instant notifications whenever changes occur in your specified Google Sheet, paving the way for the next steps in your automation.

Step 3: Add an Action Module for Email Notifications
With your Google Sheets trigger configured, the next step is to define what action should occur when a change is detected. In this example, we'll set up an email notification using the Gmail app. Click on the small circle located to the right of your Google Sheets module in the Make.com scenario editor. This will allow you to add a new module to your workflow.
In the search box, type "Gmail" and select the app. Then, choose the "Send an email" action module. Make.com will need to connect to your Google account to send emails. Click the "Add" button to establish a new connection, or select an existing Google account from the dropdown list if you've connected it before. Provide a name for your connection and click "Save." You'll then be prompted to sign into your Google account and grant Make.com the necessary access rights by clicking "Allow."
Pro tip: When configuring the Gmail module, you can dynamically pull data from your Google Sheet using Make.com's mapping features. For instance, if your sheet contains columns for "Name" and "Task," you can map these values directly into the email subject or body to create personalized and informative notifications.
Finally, configure the email details. Enter the recipient's email address and a clear subject line. In the content box, compose your email message. This is where you can leverage the data from your Google Sheet. Map the relevant "Row values" elements from the Google Sheets module into your email content. For example, you might include "Row values [1]: A" and "Row values [1]: B" to insert data from specific columns. You can also use Make.com's built-in functions, such as formatDate from the Date and time tab, to format dates as needed (e.g., DD-MM-YY). Once all fields are set, your Gmail module is fully configured and ready to send notifications.
Step 4: Test and Activate Your Scenario
Before making your scenario live, it's crucial to test it to ensure everything is working as expected. First, save your scenario by clicking the "Save" button located at the bottom of the Make.com editor. This preserves your progress and prepares the scenario for execution.
Next, click the "Run once" button. This will put your scenario into a listening state, waiting for a trigger. Go back to your Google Sheet and add at least one new row of data. This action will trigger the webhook, and Make.com will attempt to execute the scenario. Observe the scenario editor; if successful, you'll see numbered circles appear on each module, indicating the number of operations consumed during that execution.
Click on these numbered circles to view the input and output details of each module. For instance, the Google Sheets module's output should show the bundle of data corresponding to the new row you added. Similarly, the Gmail module's output will confirm that the data was received as input and that an email with the specified content was sent to the intended recipient. Once you've verified that the test run was successful and the email was delivered correctly, the final step is to activate your scenario. Toggle the switch located at the bottom left corner of the editor to "On." Your automation is now live and will send instant email notifications whenever your Google Sheet is updated. Happy automating!