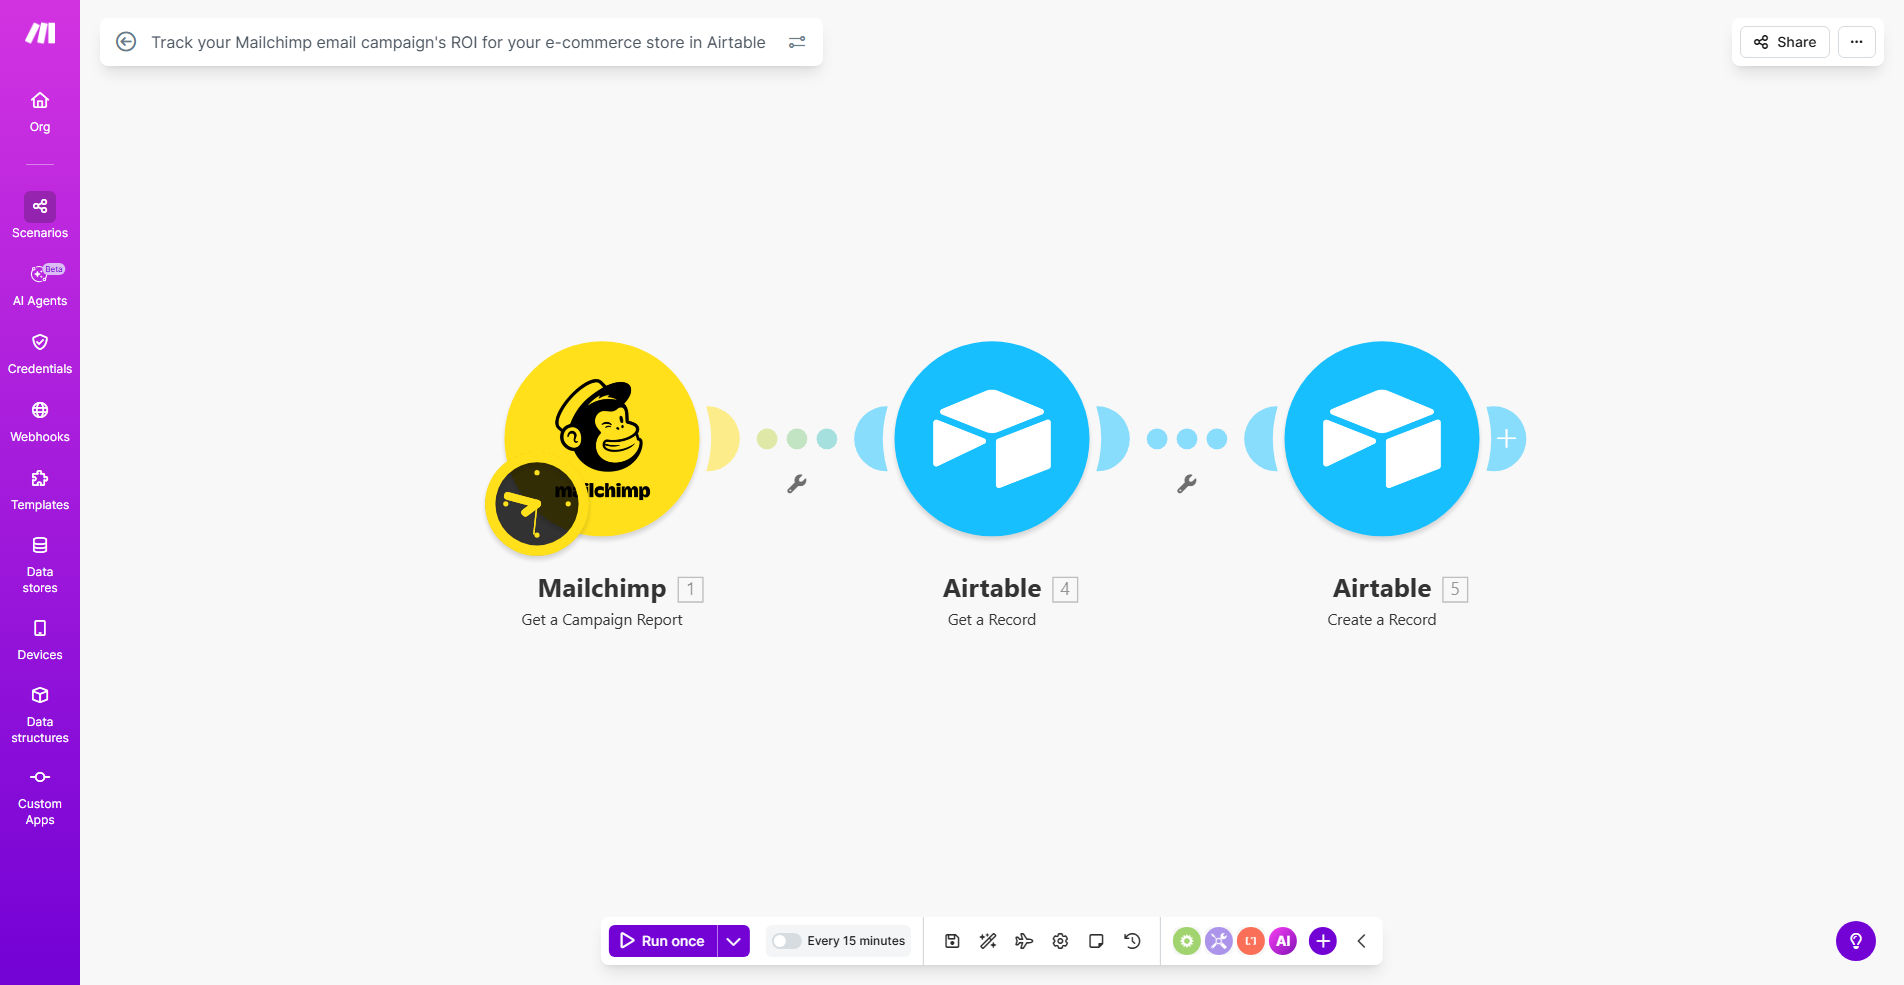
What This Workflow Does
For e-commerce businesses, email marketing is a powerful revenue driver, but its true impact often remains a mystery. Manually linking sales from Shopify, WooCommerce, or other platforms back to specific Mailchimp campaigns is a tedious, error-prone task. This leads to flying blind—you might know an email had a good open rate, but you don't know if it actually generated profit after accounting for costs.
This automated workflow solves that problem by creating a seamless pipeline between your marketing and sales data. It automatically fetches campaign performance data from Mailchimp, retrieves corresponding order data from your e-commerce platform, and calculates key financial metrics like revenue, cost, and ROI. All this enriched data is then logged into a structured Airtable base, giving you a real-time, centralized dashboard of your email marketing's financial performance.
The result is clarity. You can instantly see which campaigns are your top performers, which segments yield the highest average order value, and where your marketing budget is best spent. This moves you from guessing to data-driven decision-making, allowing you to optimize campaigns for maximum return.
How It Works
The automation acts as a intelligent bridge between your systems, operating on a scheduled basis (e.g., daily or weekly) to keep your data fresh.
Step 1: Fetch Campaign Data from Mailchimp
The workflow triggers and connects to your Mailchimp account via the Make.com module. It retrieves data for recent campaigns, including send time, subject line, recipient list, opens, clicks, and, crucially, any custom tracking parameters (like `utm_campaign`) you've used.
Step 2: Pull Corresponding Sales from E-commerce Platform
Using the campaign identifiers (like the campaign name or UTM parameters) and the time window of the send, the automation queries your connected e-commerce platform. It searches for orders placed by customers who received the email, attributing the revenue to the specific campaign.
Pro tip: Use consistent UTM parameters in your Mailchimp campaign links. This makes the sales attribution process much more accurate and reliable than relying solely on customer email matching.
Step 3: Calculate ROI & Key Metrics
For each campaign, the workflow performs the calculations. It totals the attributed revenue, subtracts any associated costs (like the cost of the email service or design fees), and computes the Return on Investment (ROI). It can also calculate metrics like Revenue Per Email Sent and Average Order Value from the campaign.
Step 4: Log Everything in Airtable
Finally, all this synthesized information—campaign details, engagement stats, attributed revenue, costs, and calculated ROI—is written into a dedicated Airtable base. Each campaign becomes a record, creating a searchable, filterable, and reportable database of your email marketing performance.
Who This Is For
This automation is ideal for e-commerce store owners, marketing managers, and growth specialists who use Mailchimp and are tired of manual reporting. It's perfect for businesses that run regular promotional emails, newsletters, or abandoned cart sequences and need to prove their direct impact on sales. If you're allocating a significant portion of your marketing budget to email and need to justify it with hard numbers, this workflow is for you.
What You'll Need
- A Make.com account (free tier available) to run the automation.
- A Mailchimp account with Standard or Premium plan (to access campaign reporting via API).
- An Airtable account and a base set up with a table to receive the campaign data (columns for Campaign Name, Send Date, Revenue, Cost, ROI, etc.).
- Access to your e-commerce platform's API (like Shopify, WooCommerce, BigCommerce) or a way to export order data that can be linked back to email campaigns.
- Basic familiarity with setting up connections (API keys) between these services in Make.com.
Quick Setup Guide
- Clone the Template: Click "Get This Workflow" and duplicate the scenario into your Make.com account.
- Connect Your Apps: In the Make.com scenario, establish the connections (called "modules") for Mailchimp, your e-commerce platform (e.g., Shopify), and Airtable by entering your API keys or logging in.
- Configure Airtable: Ensure your Airtable base has a table with the correct field names that match what the workflow will send. The template will guide you on the expected format.
- Set the Schedule: Configure the schedule module to run the workflow as often as you need updates (e.g., every 24 hours).
- Test & Activate: Run the scenario once in test mode with a past campaign to verify data flows correctly from Mailchimp to your e-commerce store and into Airtable. Then, activate the scenario to let it run automatically.
Key Benefits
Eliminate 5–10 hours of manual reporting each month. This automation replaces the tedious process of exporting CSV files from multiple systems, using VLOOKUPs in spreadsheets, and manually calculating metrics, freeing up your time for strategic work.
Make confident budget decisions with accurate ROI data. By knowing the exact profitability of each campaign, you can confidently increase spend on high-performing themes, segments, or offer types and pause what isn't working, optimizing your marketing spend.
Create a single source of truth for marketing performance. Your Airtable base becomes a living report that anyone on your team can access. This improves transparency and alignment between marketing and sales or leadership teams.
Scale your email marketing with data, not guesswork. As you grow and send more campaigns, the manual tracking method breaks down. This automated system scales effortlessly, providing consistent, reliable insights no matter your volume.
Identify hidden opportunities and trends. With all historical data in one searchable database, you can easily analyze trends over time, like seasonal performance or the long-term value of subscribers from different acquisition campaigns.