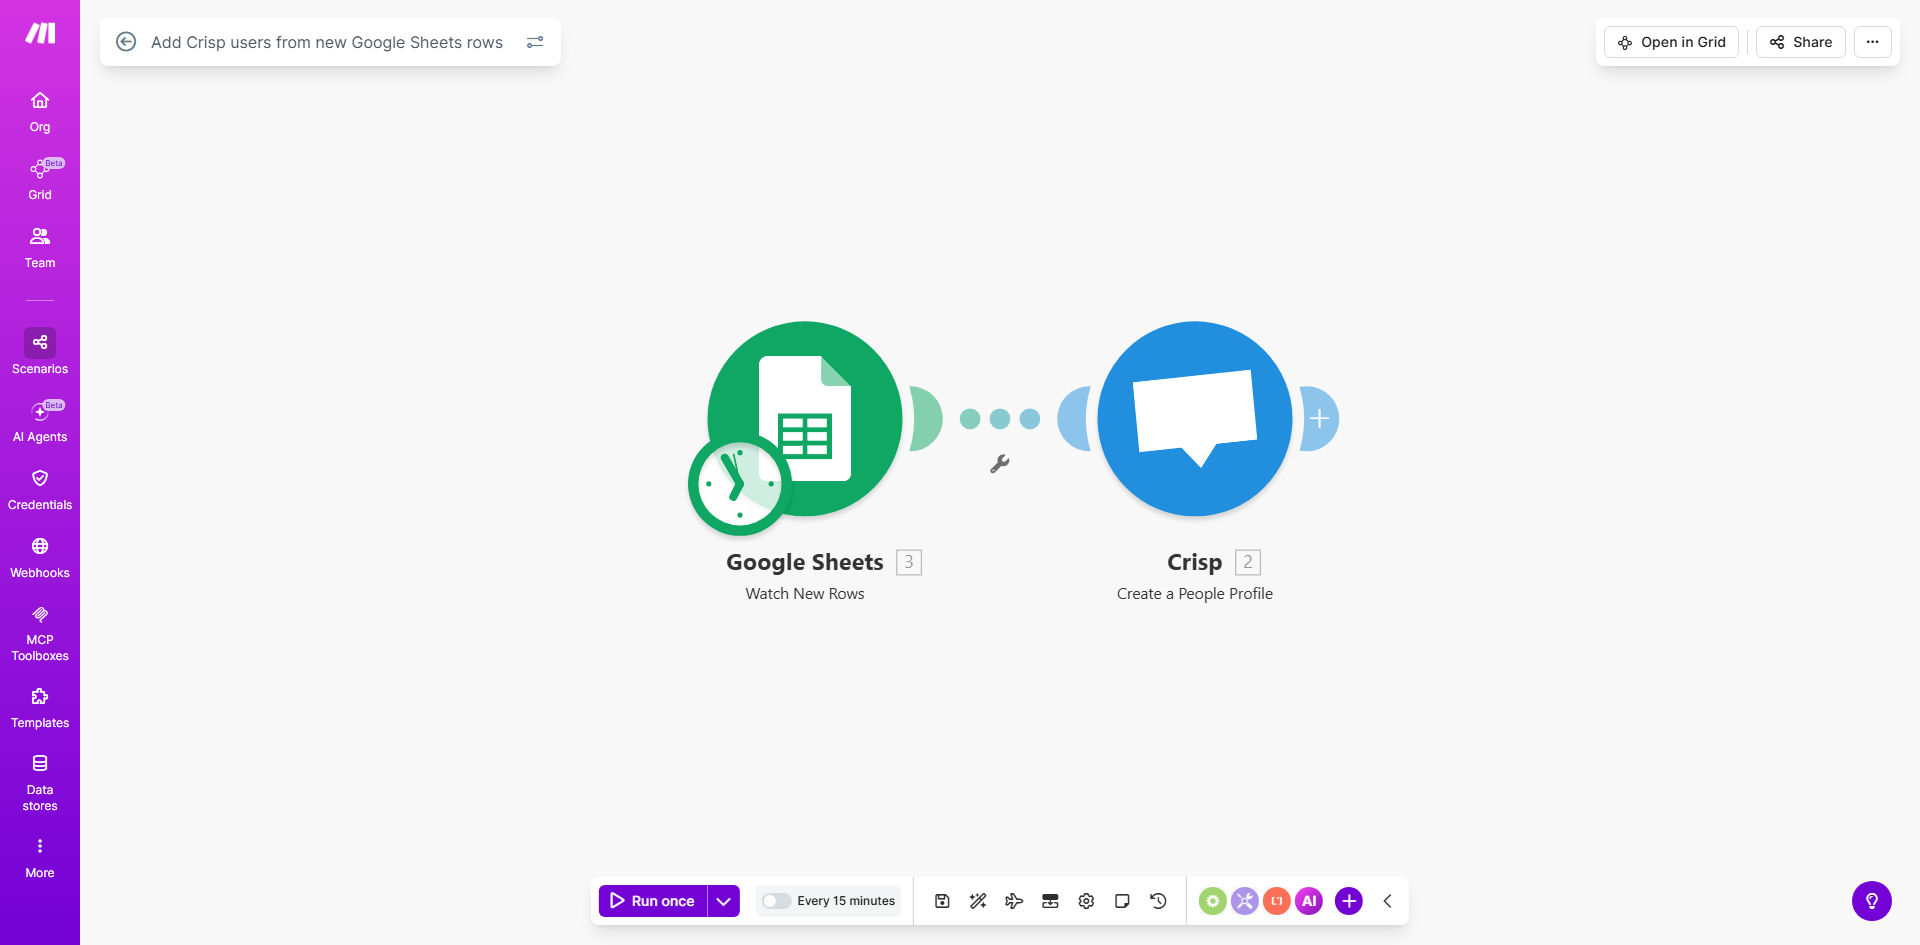
What This Workflow Does
Manually adding new customers or leads to your live chat support system is a repetitive, error-prone task that steals time from your support team. When a new user signs up via a form, is added by sales, or comes from a webinar list, someone has to copy their details from a spreadsheet into Crisp. This delay means your support agents start conversations without crucial context, leading to slower responses and a poorer customer experience.
This free Make.com template solves that by creating a seamless, automatic bridge between Google Sheets and Crisp. Whenever a new row is added to your designated spreadsheet—whether it's a list of new trial users, paid customers, or support contacts—the workflow instantly triggers. It reads the data, formats it correctly, and uses the Crisp API to create a fully-formed user profile. Your support team gains immediate visibility, and you maintain a perfectly synchronized customer database without lifting a finger.
Pro tip: Use this workflow not just for new signups, but also to backfill your Crisp account with existing customers from your CRM or billing system by exporting them to a Google Sheet first.
How It Works
The automation follows a simple, reliable sequence to ensure data flows accurately from your spreadsheet to Crisp.
Step 1: Monitor Google Sheets for New Rows
The workflow starts by watching a specific Google Sheets spreadsheet. It is configured to trigger instantly whenever a new row is added. You can define which sheet and column range to monitor, giving you full control over the data source.
Step 2: Extract and Map User Data
Make.com reads the values from the new row. It maps spreadsheet columns—like 'Email', 'Full Name', 'Phone', and 'Company'—to the corresponding user profile fields required by Crisp. You can also include custom data attributes to segment users or provide additional context to your agents.
Step 3: Create the User in Crisp
The workflow sends a secure API call to your Crisp workspace with the compiled user data. Crisp then creates a new user profile with all the provided information. The user is now immediately visible in your Crisp dashboard, ready for any incoming chats or for proactive outreach.
Step 4: Handle Outcomes and Errors
The template includes basic error handling. If the user creation fails (e.g., due to a duplicate email or an API issue), the workflow can log the error or send a notification. For advanced setups, you can add steps to update the original spreadsheet row with a 'Status' like 'Created' or 'Failed'.
Who This Is For
This automation is a game-changer for any business using Crisp for customer support or engagement that manages user lists elsewhere.
Startups & SaaS Companies: Perfect for automatically adding new trial users or customers from your signup forms or billing system (via a Google Sheets export) into Crisp, enabling instant, personalized support.
Marketing & Sales Teams: Ideal for syncing leads from campaigns, webinars, or CRM lists into Crisp for targeted, conversational follow-up and qualification.
Customer Success & Support Managers: Essential for ensuring your support team has a complete, up-to-date user roster without manual admin work, leading to faster, more informed customer interactions.
What You'll Need
- A Make.com account (free tier available).
- A Crisp account with an active workspace.
- Your Crisp API credentials (identifier and key), which you can find in your Crisp workspace settings.
- A Google Sheets spreadsheet with your user data. The template includes a link to an example structure to follow.
- Access to the Google account that owns the spreadsheet to grant the necessary permissions to Make.com.
Quick Setup Guide
You can have this automation running in under 15 minutes by following these steps.
- Get the Template: Click "Get This Workflow" to copy the template into your Make.com account.
- Connect Google Sheets: In the first module, authenticate and select your spreadsheet and the specific worksheet you want to monitor for new rows.
- Connect Crisp: In the Crisp module, enter your API credentials (identifier and key) to link your workspace.
- Map Your Data: Match the columns from your Google Sheet (e.g., Column B for email, Column C for name) to the required fields in the Crisp "Create a Person" action.
- Test and Activate: Add a test row to your Google Sheet and run the scenario once to verify a user appears in your Crisp dashboard. Then, turn the scenario on to run automatically.
Pro tip: Create a dedicated "Automation Log" column in your Google Sheet. Use a simple Make.com step to mark rows as "Processed" or log a timestamp after successful creation. This gives you a clear audit trail.
Key Benefits
Eliminate 100% of manual user entry. Free your team from the tedious, error-prone task of copying and pasting data between systems. What used to take minutes per user now happens instantly and perfectly in the background.
Improve first-response time and customer satisfaction. Support agents see new users immediately with full profile context. They can greet customers by name and reference their signup details, creating a professional, personalized experience from the very first message.
Ensure data consistency across your stack. By making Google Sheets your central input point, you guarantee that the user information in Crisp is always synchronized with your master customer list, eliminating outdated or conflicting data.
Scale your support onboarding effortlessly. Whether you add 10 or 10,000 new users, the automation handles the load without any additional effort from your team, allowing you to grow your customer base without proportionally growing administrative overhead.
Gain a foundation for advanced automations. This workflow is a building block. Once it's running, you can easily extend it to add users to segments, send welcome messages, or trigger notifications in Slack when a high-value lead is added.