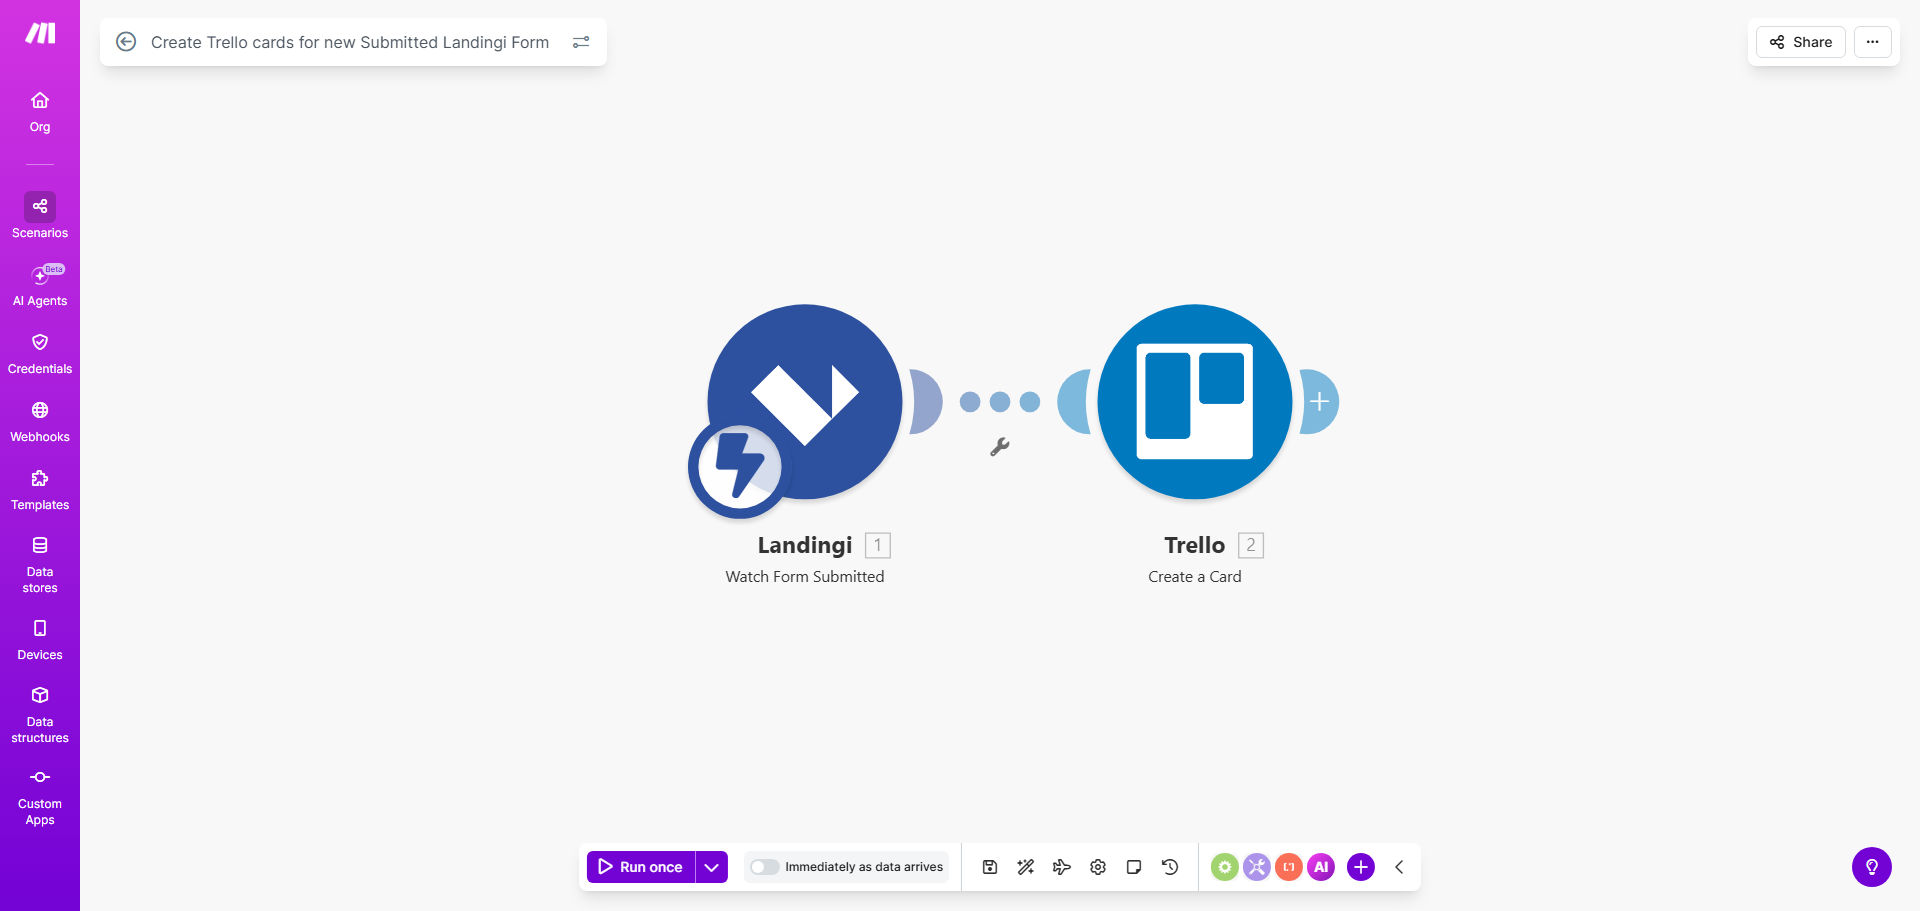
What This Workflow Does
For businesses using Landingi to capture leads, client inquiries, or project requests, the manual process of transferring that data into a project management tool like Trello is a silent productivity killer. It creates delays, introduces errors, and causes important requests to be forgotten in crowded inboxes or spreadsheets.
This automated workflow solves that by creating a seamless bridge between your landing pages and your task board. Every time a visitor submits a form on your Landingi page, this Make.com scenario triggers instantly. It captures all the submitted data—name, email, message, custom fields—and uses it to create a new, detailed card on your specified Trello board. The card can be placed in a specific list (like "New Leads" or "To-Do"), include labels, attachments, and assigned team members, turning a form submission into an immediate, trackable action item.
The result is a closed-loop system where marketing capture directly fuels operational execution. Your sales or service team can start working on a request within minutes of it being submitted, dramatically improving conversion rates and customer satisfaction.
How It Works
The automation follows a simple, reliable sequence managed by Make.com.
Step 1: Trigger on New Landingi Submission
The workflow starts by watching your Landingi account for new form submissions. Make.com connects to Landingi via API and monitors your forms in real-time. The moment a submission is recorded, the automation wakes up and grabs the entire payload of data.
Step 2: Parse and Structure the Form Data
Make.com then processes the incoming data. It can filter submissions based on the specific form ID, extract individual field values (like "Full Name," "Email Address," "Project Description"), and even handle file uploads by retrieving the download links. This step ensures clean, organized data is ready for Trello.
Step 3: Create the Trello Card
Finally, the workflow connects to your Trello account via its API. It uses the structured data to create a new card on your chosen board and list. You can map form fields directly to the card's title, description, checklist, or comments. For example, the card title could be "New Lead: [Name]" and the description could contain their contact details and inquiry.
Pro tip: Use Trello's custom fields or labels to categorize cards automatically. For instance, if a form has a "Service Type" dropdown, you can set the automation to add a corresponding label (e.g., "Design," "Consulting") to the new card for instant visual sorting.
Who This Is For
This automation is a game-changer for any business or team that relies on web forms for intake and uses Trello for task management.
Agencies & Freelancers: Capture project inquiries, client briefs, or contact requests and instantly turn them into cards on your project pipeline board. Never miss a potential client.
Small Business Sales Teams: Route "Contact Us" or "Quote Request" form submissions directly to a sales board. Assign cards to reps and track follow-ups from lead to close.
Support & Operations Teams: Manage internal requests, IT tickets, or feedback forms by creating actionable cards in a dedicated service board, ensuring every request is logged and addressed.
Event Organizers & Educators: Automatically create attendee or registrant cards from sign-up forms, making participant management and communication follow-up effortless.
What You'll Need
To set up this workflow, ensure you have the following accounts and access ready:
- A Make.com account (free tier is sufficient to run this automation).
- An active Landingi account with at least one published form collecting submissions.
- A Trello account with a board and list where you want the new cards to appear.
- API credentials (keys/tokens) for both Landingi and Trello, which you'll provide during the Make.com setup. These are easily obtained from each platform's settings.
Quick Setup Guide
Follow these steps to deploy the template in under 15 minutes:
- Clone the Template: Click "Get This Workflow" to open the template on Make.com. Press the "Copy" button to create your own private scenario.
- Connect Your Apps: In your new scenario, click on the Landingi module and authorize Make.com to access your account. Repeat the process for the Trello module.
- Configure the Trigger: Select the specific Landingi form you want to monitor from the dropdown menu in the trigger module.
- Map the Data: In the Trello "Create a Card" module, choose your target board and list. Then, map the form fields from Landingi to the desired fields in Trello (e.g., map "Email" to the card description).
- Test & Activate: Use the "Run once" feature to test the workflow. Submit a test form on your Landingi page and verify a card appears in Trello. Once confirmed, turn the scenario ON.
Key Benefits
Eliminate Manual Data Entry: Save 5-15 minutes per form submission by automatically transferring information from Landingi to Trello. This reclaims hours each week for high-value work instead of administrative copying and pasting.
Accelerate Response Times: Turn lead response time from hours (or days) to seconds. By instantly creating a task for your team, you can contact hot leads while they're still engaged, significantly boosting conversion rates.
Ensure 100% Data Capture: Remove the risk of human error or forgotten submissions. Every single form entry is guaranteed to become a tracked item in your project management system, creating a reliable audit trail.
Improve Team Coordination: Centralize all incoming requests into Trello, your team's single source of truth. Everyone can see new cards, understand priorities, and assign work transparently, improving collaboration and accountability.
Scale Your Processes Effortlessly: As your form volume grows, the automation scales with you. Handling 10 or 1000 submissions a day requires zero additional effort from your team, allowing you to grow without proportional increases in overhead.