What This Workflow Does
Every support team faces the silent problem of undelivered emails. You send a crucial update or solution to a customer, but their inbox is full, their address is wrong, or their server blocks it. The email bounces, but the Zendesk ticket sits idle, showing no response. Your agent assumes the customer is unresponsive, while the customer wonders why they've been ignored. This breakdown damages trust and blows out resolution times.
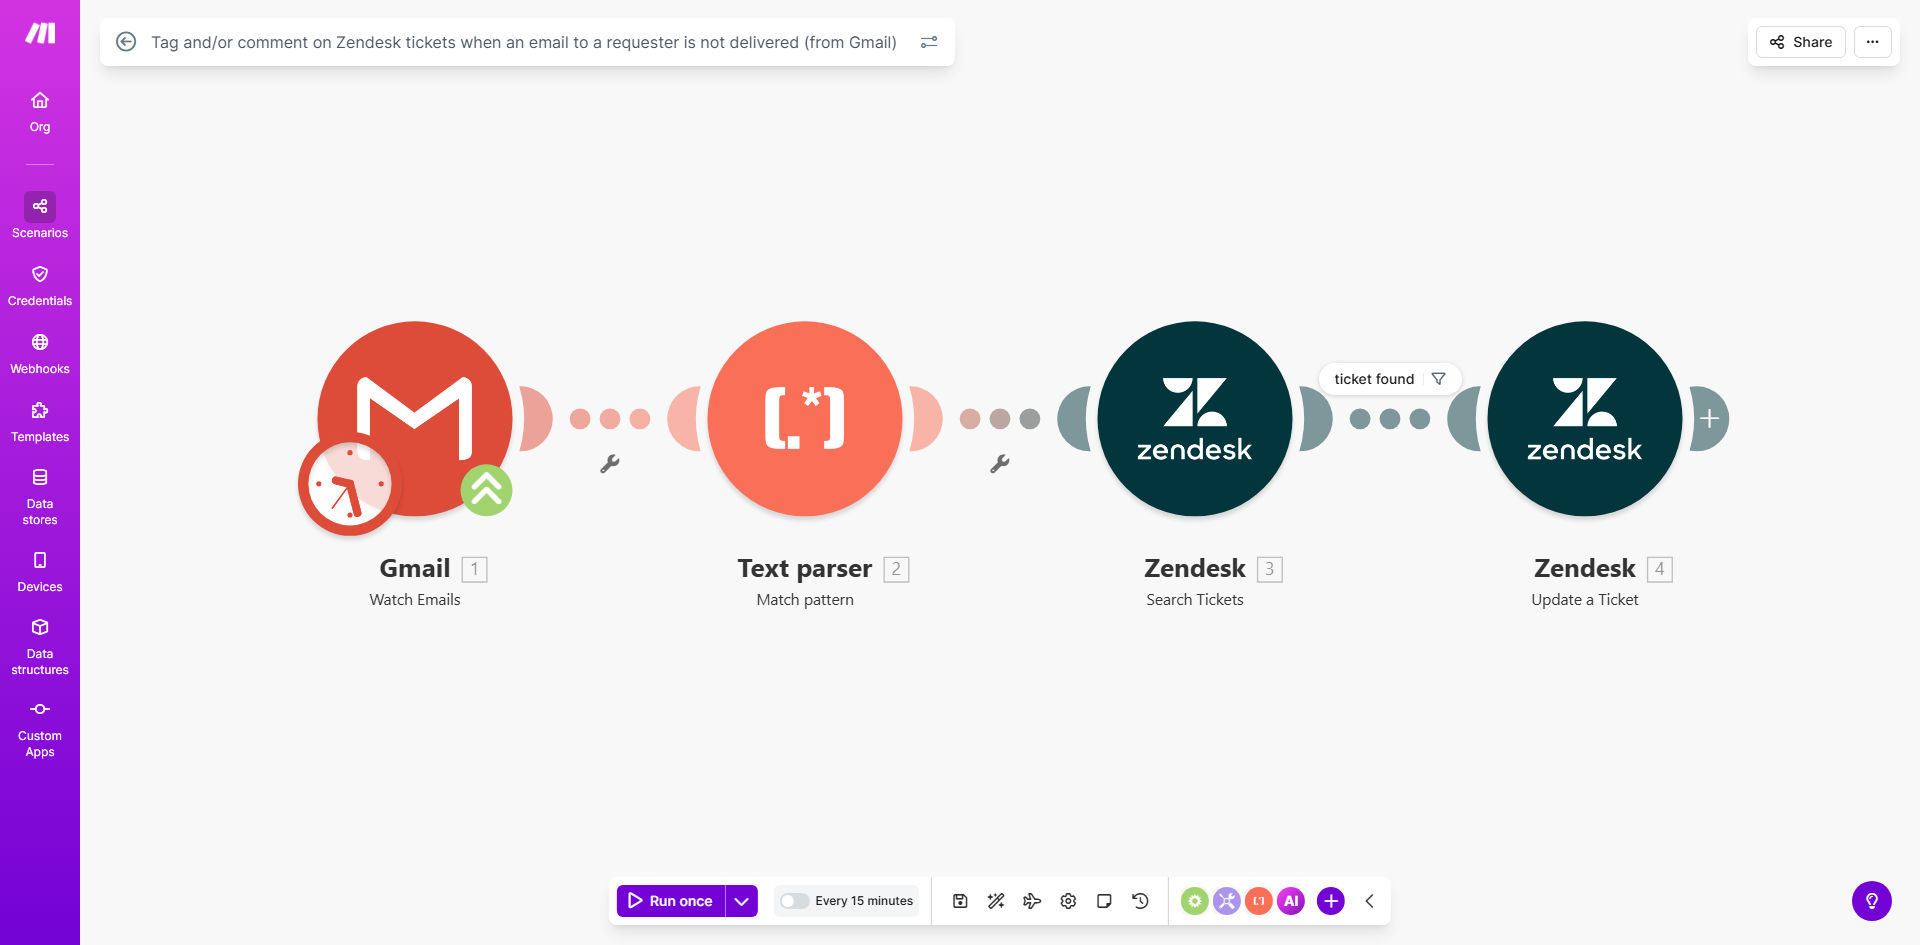
This automation solves that by creating a direct bridge between Gmail's bounce notifications and Zendesk. When an email to a ticket requester fails to deliver, the workflow automatically detects the bounce, finds the corresponding Zendesk ticket, and adds a tag (like email_bounced) and/or an internal comment alerting the team. This turns an invisible failure into a visible, actionable alert, empowering your team to switch communication channels and resolve issues faster.
How It Works
The workflow acts as a smart monitor and communicator between your email system and your help desk.
Step 1: Monitor Gmail for Bounce Notifications
The scenario watches your connected Gmail account for new messages. It's specifically configured to identify automated "Mail Delivery Subsystem" emails or other bounce notifications that indicate a sent message failed to reach the recipient.
Step 2: Parse the Bounce & Extract Ticket Data
It reads the bounce notification email to extract key details: the original recipient's email address and often the subject line or a unique ticket ID from the original sent message. This data is crucial for finding the right ticket in Zendesk.
Step 3: Find the Matching Zendesk Ticket
Using the extracted email address, the automation searches your Zendesk instance for the most recent open or pending ticket associated with that requester. It ensures the action is taken on the correct conversation.
Pro tip: Configure the search to look for tickets updated within the last 7 days to avoid accidentally updating very old, resolved tickets.
Step 4: Update the Ticket with Tag and Comment
Once the ticket is found, the workflow performs the core actions. It adds a predefined tag (e.g., contact_issue, follow_up_phone) to make the ticket easily filterable. Simultaneously, it posts an internal comment stating, "Alert: Email to requester failed to deliver on [Timestamp]. Please follow up via alternate method." This creates a permanent audit trail.
Who This Is For
This template is essential for any business using Zendesk for customer support and Gmail/Google Workspace for communication.
- Support Teams & Managers: Teams struggling with SLA breaches due to unnoticed communication failures. It gives managers visibility into delivery issues.
- Customer Success Departments: Teams where maintaining proactive communication is critical for retention. Prevents customers from churning due to perceived unresponsiveness.
- E-commerce & SaaS Companies: Businesses with high ticket volumes where manual monitoring of bounces is impossible. Ensures no customer query falls through the cracks.
- IT Help Desks: Internal support teams where timely resolution is paramount, and alternative contact methods (like Slack or phone) are readily available.
What You'll Need
- A Make.com account (free tier available).
- A Zendesk account (Admin or Agent permissions to create API tokens and modify tickets).
- A Gmail or Google Workspace account used for sending support emails, with access to enable API connections.
- The sender email address that generates bouncebacks must be the one connected in the scenario.
- Basic understanding of how to copy a template and connect apps in Make.com (we guide you through it).
Quick Setup Guide
You can have this automation running in under 15 minutes.
- Get the Template: Click "Get This Workflow" to open the template in your Make.com account and create a copy.
- Connect Gmail: In the first module, authorize Make.com to access your Gmail account. Use the service account email that sends support replies.
- Connect Zendesk: In the Zendesk modules, create an API token in your Zendesk admin settings and provide your subdomain to establish the connection.
- Configure the Search: Adjust the Zendesk "Search Tickets" module to filter by the requester's email and an appropriate ticket status (like "Open," "Pending").
- Customize the Actions: Set the specific tag you want to add (e.g.,
email_undelivered) and edit the internal comment text to match your team's voice and procedures. - Turn it On: Activate the scenario. It will now run automatically, checking for new bounce notifications at the interval you set (e.g., every 15 minutes).
Key Benefits
Eliminate Manual Monitoring: Save each support agent 30-60 minutes per week previously spent checking sent folders or wondering why customers aren't replying. The automation does the detective work for them.
Improve First-Contact Resolution Rates: By immediately flagging communication failures, agents can proactively call or message the customer via other channels before the ticket stalls, often resolving the issue within the same business day.
Enhance Customer Satisfaction (CSAT): Customers are amazed when a support agent calls them after an email fails, saying, "We noticed you didn't get our email." This level of proactive care dramatically increases trust and satisfaction scores.
Maintain SLA Compliance: Prevent SLA breaches caused by factors outside your control. The automated comment serves as documentation that the delay was due to a contact issue, not team negligence.
Create Valuable Data: The email_bounced tag allows you to run reports on how often contact information is invalid, providing insights to improve data collection on signup forms or client onboarding processes.