What This Workflow Does
Every customer support team faces a hidden problem: emails that never reach the customer. When a support agent sends a reply, update, or solution via Microsoft 365, a delivery failure (bounce) often goes unnoticed. The ticket sits in a "waiting for customer" state, while the customer is unaware and growing frustrated. This workflow solves that critical visibility gap.
By connecting Microsoft 365's email delivery reports with Zendesk, this automation acts as a silent watchdog. It continuously monitors for non-delivery reports (NDRs) or bounce notifications. When one is detected, it instantly finds the related Zendesk ticket and updates it—either by adding a specific tag like "email_failed", posting an internal comment for agents, or both. This transforms an invisible failure into a visible, actionable alert right inside your helpdesk.
Pro tip: Use this automation to trigger follow-up actions, like automatically creating a task to call the customer or send an SMS, turning a communication breakdown into an opportunity for exceptional service.
How It Works
The workflow is a straightforward, reliable pipeline that turns email system data into helpdesk intelligence.
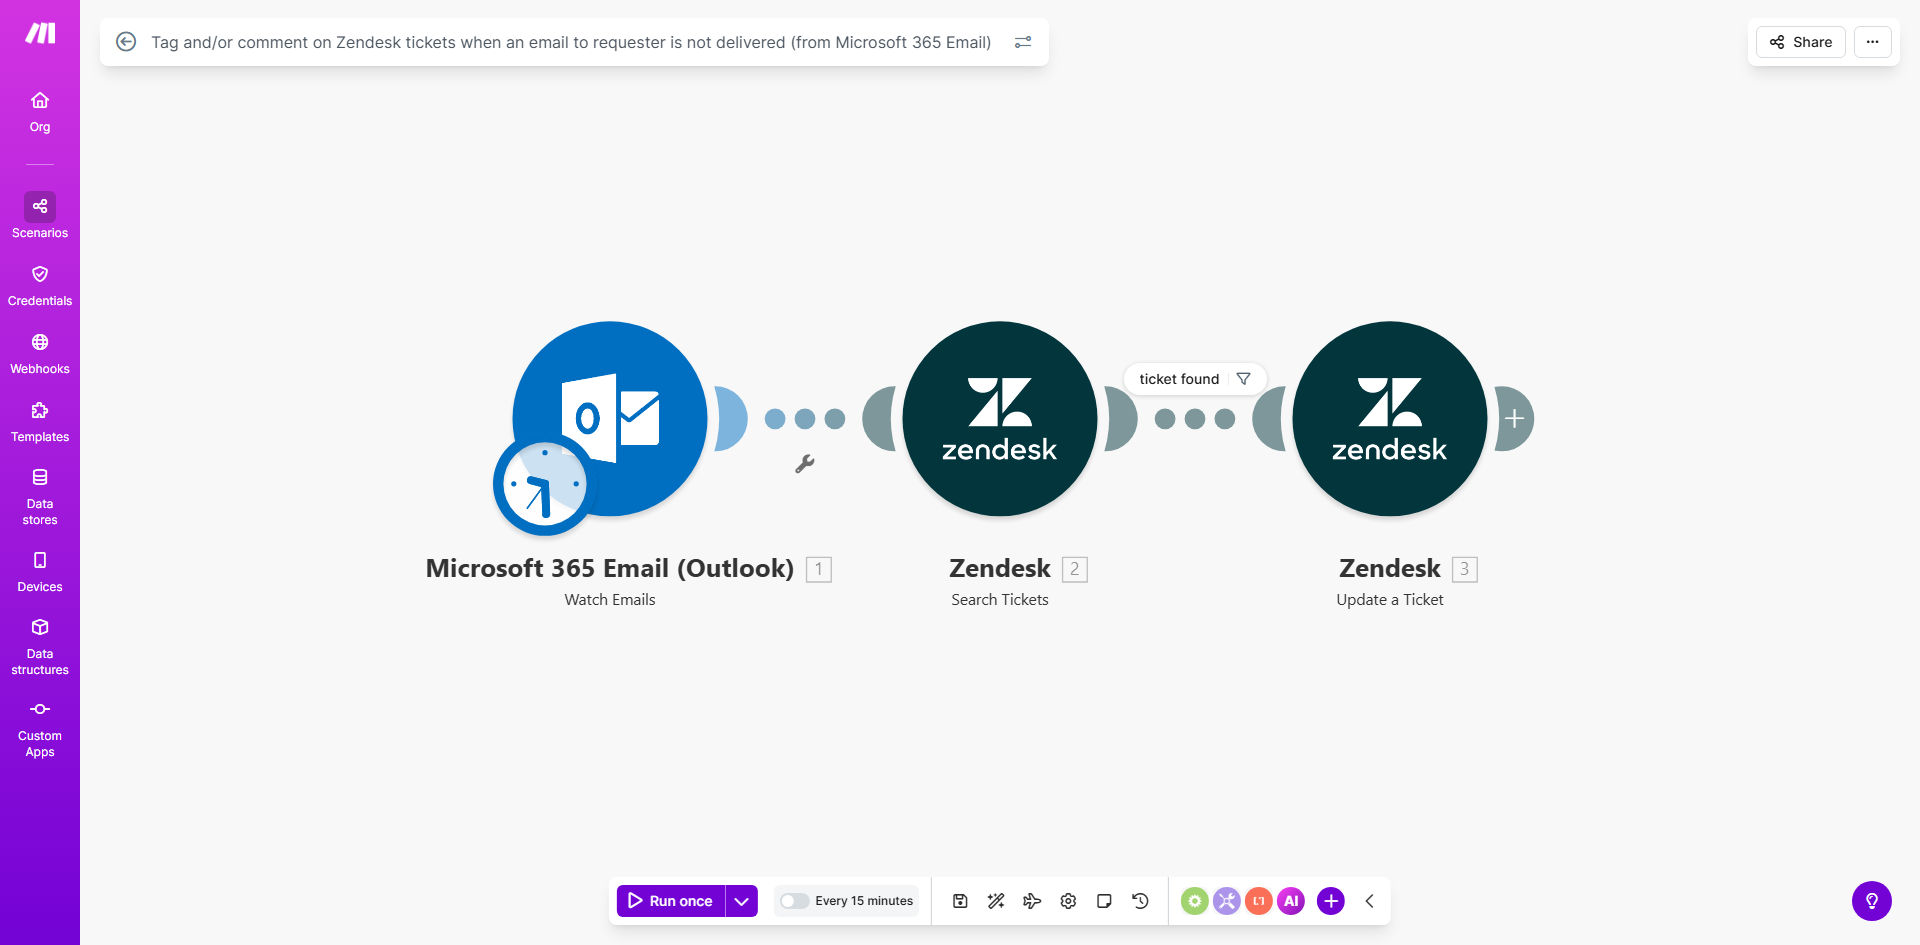
Step 1: Monitor Microsoft 365 for Failed Emails
The scenario starts by watching a specific Microsoft 365 mailbox or folder (like the Inbox or a dedicated "Bounces" folder) for new emails that are non-delivery reports. Make.com uses the Microsoft 365 Email module to trigger whenever a new bounce notification arrives.
Step 2: Parse the Bounce Notification
The content of the bounce email is parsed to extract key information. This includes the original recipient's email address (the customer), the original subject line, and the bounce reason. The workflow uses text parsing or filters to ensure it only acts on relevant failure notifications.
Step 3: Find the Matching Zendesk Ticket
Using the extracted customer email address and possibly the subject, the automation searches your Zendesk instance. It looks for an open or recent ticket from that requester. Accurate matching ensures the update is applied to the correct conversation history.
Step 4: Update the Zendesk Ticket
Once the ticket is found, the workflow performs the configured actions. It can add a tag (e.g., communication_failed, needs_alt_contact) for easy filtering and reporting. Simultaneously, it can post an internal comment, providing agents with context: "Alert: Email to customer bounced on [Timestamp]. Reason: Mailbox full."
Who This Is For
This template is designed for any business using Zendesk for customer support and Microsoft 365 for outgoing communication.
- Support Teams & Managers: To maintain SLA compliance and ensure no ticket is stuck due to failed emails. It's crucial for teams measured on first response time and resolution rates.
- Customer Success Departments: To proactively manage customer relationships by identifying when primary contact channels fail, allowing for swift intervention.
- IT & Operations Teams: To gain visibility into email deliverability issues at the point of customer interaction, which can be an early indicator of broader domain or configuration problems.
- Growing Startups & SMBs: To automate a manual, error-prone process without needing dedicated developer resources, freeing up agents to focus on solving problems, not tracking them.
What You'll Need
- A Make.com account (free or paid plan).
- A Zendesk account (Support, Suite) with admin access to generate an API token.
- A Microsoft 365 business or enterprise account with Exchange Online.
- Permissions to create an Azure AD App Registration for Microsoft 365 API access (requires admin consent for delegated permissions like Mail.Read).
- Basic understanding of how to copy API keys and connection details between platforms.
Quick Setup Guide
You can have this automation running in under 30 minutes by following these steps.
- Clone the Template: Click "Get This Workflow" and duplicate the scenario into your Make.com account.
- Connect Microsoft 365: In the first module, create a connection to your Microsoft 365 account using OAuth. Ensure it has access to read mail in the mailbox you want to monitor.
- Connect Zendesk: In the Zendesk module, create a connection using your subdomain, admin email, and a generated API token from Zendesk's admin settings.
- Configure the Trigger: Set the Microsoft 365 module to watch the correct folder (e.g., Inbox) and optionally add filters to only catch bounce notification emails.
- Set Update Actions: Define what you want to happen in Zendesk. Choose to add tags, post a comment, or both. Customize the comment text to include useful bounce details.
- Test & Activate: Run a test by simulating a bounce or using an existing bounce email. Check that the correct Zendesk ticket is tagged/commented. Then, activate the scenario to run automatically.
Key Benefits
Eliminate Manual Bounce Checking: Save each support agent 15-30 minutes per day previously spent sifting through bounce reports or delivery failure logs. This time is reinvested into solving more customer issues.
Improve First-Contact Resolution Rates: By immediately knowing an email failed, agents can switch channels (e.g., phone, chat) within minutes instead of days, dramatically reducing resolution time and increasing the likelihood of solving the issue on the first try.
Enhance Customer Satisfaction (CSAT): Proactively reaching out after a failed email demonstrates attentiveness and care. Customers are less likely to escalate or churn when they see your team is actively ensuring they receive communication.
Maintain Accurate Ticket Status & SLAs: Automatically tagging tickets prevents them from being incorrectly classified as "awaiting customer reply." This allows for accurate reporting, fair SLA measurements, and better workload distribution.
Gain Valuable Deliverability Insights: The aggregated data from tags and comments provides a clear picture of which customers or domains have frequent delivery issues, informing data-driven decisions about communication strategies.