What This Workflow Does
For any business using Stripe to manage subscriptions and Mailchimp for email marketing, a critical gap often exists: your paying customers aren't automatically in your marketing funnel. Manually exporting and importing customer lists is slow, error-prone, and means missed opportunities to engage subscribers right after they sign up.
This automation solves that by creating a live bridge between your payment data and your email platform. Every time a new subscription is created in Stripe, this workflow instantly adds that customer as a subscriber in your designated Mailchimp audience. More than just adding an email, it tags them based on their specific subscription plan (e.g., "Plan: Pro Monthly", "Plan: Basic Annual"). This transforms anonymous payment records into actionable marketing segments.
The result is a fully synchronized system where your email campaigns can be precisely targeted based on real purchase behavior. Welcome new customers instantly, nurture different tiers with relevant content, and recover failed payments—all automatically.
How It Works
The workflow acts as an intelligent middleware, listening for events in Stripe and executing precise actions in Mailchimp. Here's the step-by-step process:
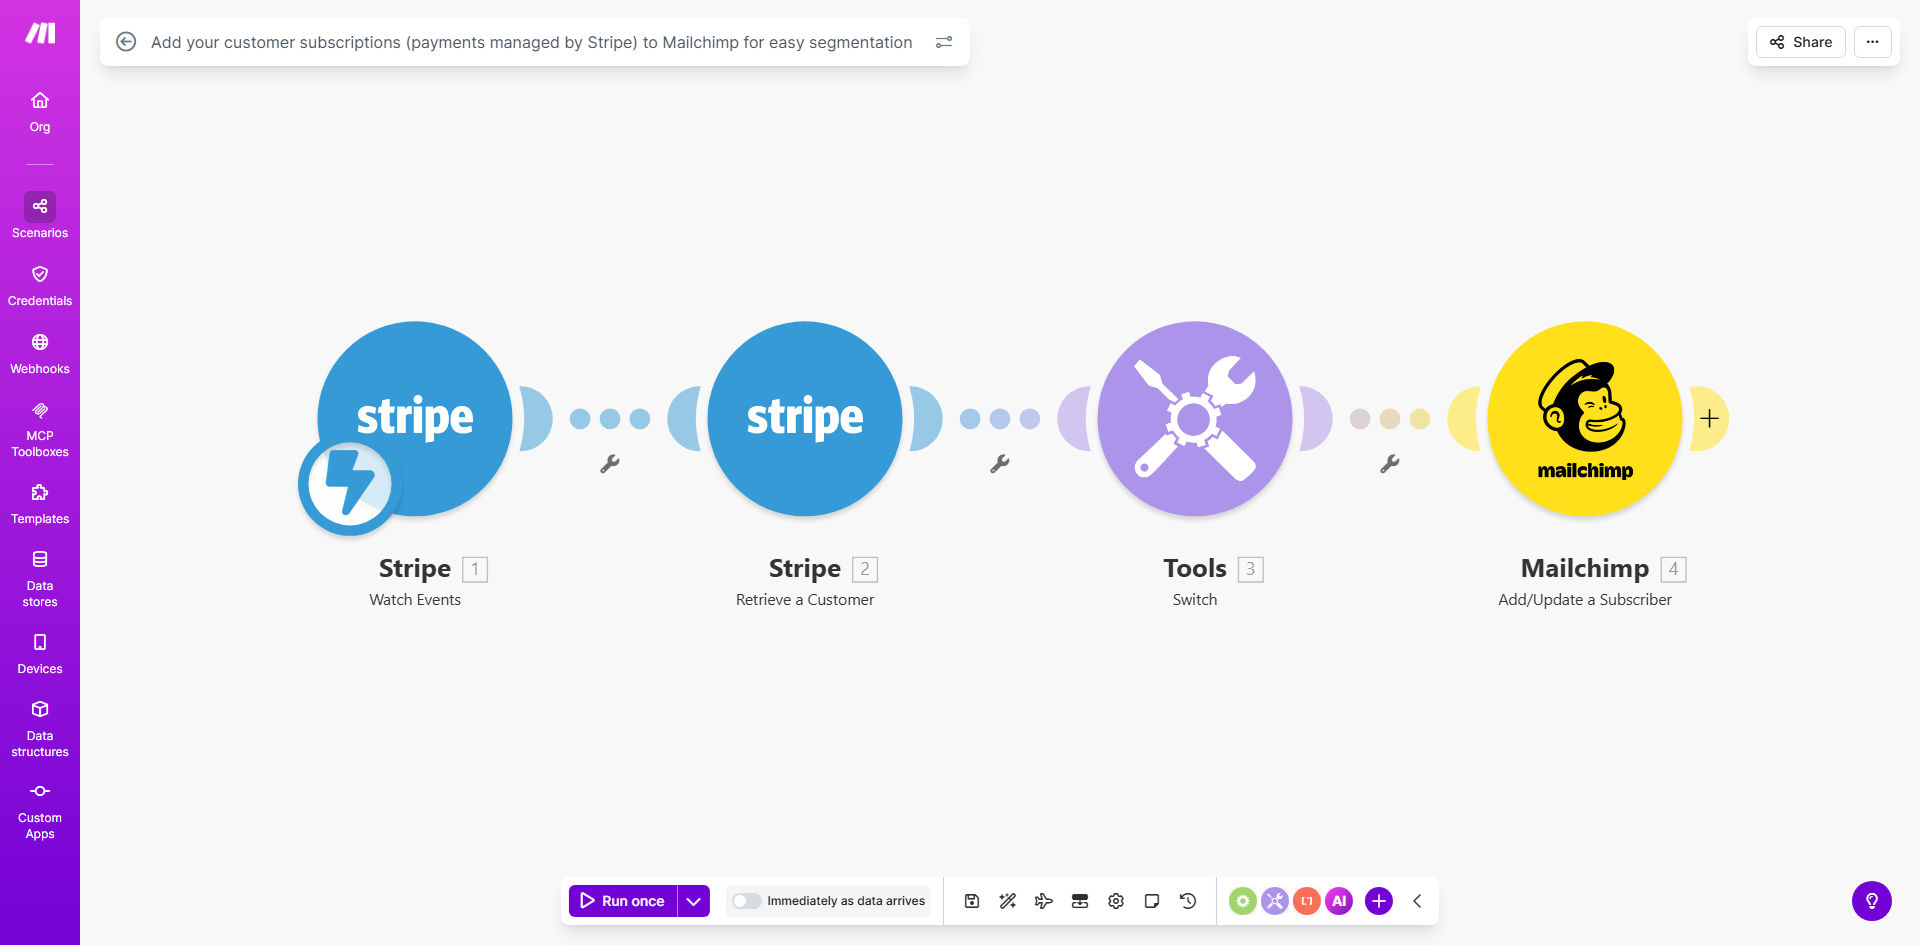
Step 1: Trigger on New Stripe Subscription
The automation is triggered the moment a new, active subscription is created in your Stripe account. The Make.com scenario watches for this specific event, capturing all the relevant data: the customer's email, name, subscription ID, plan name, and billing interval.
Step 2: Prepare and Route the Data
The captured data is then formatted for Mailchimp. The workflow checks if the customer's email is valid and maps the Stripe subscription plan to a corresponding Mailchimp tag. For example, a Stripe plan named "pro_monthly_29" can be cleaned and converted to a simple tag like "Pro Monthly Subscriber".
Step 3: Add or Update in Mailchimp
The system searches your chosen Mailchimp audience for an existing contact with this email. If found, it updates the contact's information and applies the new subscription tag. If not found, it creates a new subscriber, populating fields like First Name and adding the relevant plan tag immediately upon addition.
Pro tip: Configure the workflow to also trigger on subscription updates and cancellations. This keeps your Mailchimp segments dynamically accurate—removing tags when a customer downgrades or canceling, and adding new ones when they upgrade.
Who This Is For
This automation is a game-changer for SaaS companies, membership sites, online course platforms, and any subscription-based business using Stripe for payments and Mailchimp for communication.
It's ideal for marketing teams tired of manual list management, founders who want to automate customer onboarding, and product managers needing to segment users based on their paid features. If you charge recurring revenue and want to increase retention through targeted email, this workflow is for you.
What You'll Need
- A Stripe account with active subscriptions.
- A Mailchimp account with at least one Audience (list) set up.
- A Make.com account (free tier is sufficient to start).
- Your Stripe Secret Key and Mailchimp API key for connection.
- A clear mapping of your Stripe subscription plan names to your desired Mailchimp tags.
Quick Setup Guide
You can have this automation running in under 30 minutes. Follow these steps:
- Get the Template: Click the "Get This Workflow" button above to clone the pre-built scenario into your Make.com account.
- Connect Stripe: In the first module, authorize Make.com to access your Stripe account using your Stripe Secret Key from the Developer API section.
- Connect Mailchimp: In the Mailchimp modules, authorize the connection using your Mailchimp API key, generated from your Account > Extras > API keys.
- Configure Data Mapping: Specify which Mailchimp Audience (list) to use. Then, map the "Plan Name" field from Stripe to the "Tag" field in Mailchimp. You might add a text transformer to clean up the plan name for a better tag.
- Test & Activate: Run a single test cycle by creating a test subscription in Stripe. Check that a correctly tagged contact appears in your Mailchimp audience. Once confirmed, activate the scenario. It will now run automatically for every new subscription.
Key Benefits
Eliminate Manual Data Entry: Save 2-5 hours per week previously spent on exporting CSV files, cleaning data, and importing subscribers into Mailchimp. The automation handles it instantly and error-free.
Faster Time-to-Value: New paying customers receive your onboarding welcome email within minutes of subscribing, not days later. This immediate engagement significantly improves activation and reduces early churn.
Hyper-Targeted Campaigns: Send different email sequences to "Annual Plan" subscribers versus "Monthly Plan" subscribers. Offer exclusive upgrades to "Basic" tier users. Your marketing becomes personalized based on actual revenue data.
Improved Data Hygiene: Maintain a single source of truth. Customer email addresses and subscription status are always synchronized, preventing embarrassing marketing mistakes like offering premium features to canceled users.
Scalable Foundation: This workflow is a foundational brick for advanced marketing automation. Once this sync is in place, you can easily build upon it to trigger complex journeys based on payment failures, renewal reminders, or usage milestones.